Edit: Aug 22. Necessary changes

Edit: Neovim/LSP keybindings added

I’ve come to accept that I’m an old-school vi user. With about forty years of muscle memory behind that sentence, I’ll say that I’m an effective vi user, but in today’s world of C++ overrides, sentence-long symbols, and huge lists of available methods, I _have_ felt the occasional pang of jealosy and tried to move beyond bare bone vi. I’ll then sit back down at the terminal two days later, completely forget about that snazzy new editor that I told myself I’d learn, and immediately be back to a couple of iTerms with ack-grep just from habit. Making matters worse for myself, most of the time these days I work on ESP32 projects, so I’m dealing with cross compilers. Well, I’m not unhappy about that – having basically the same compiler on my embedded device as I do on my desktop is actually pretty sweet, but they’re always just different enough to be annoying. One difference that surfaces is that clangd-like services for Language Server Protocol (LSP) are usually just out of reach. One recent day when alternating between fighting CLion and vi (OK, it was probably actually vim; though I have flirtations with nvim.) I set out to win this battle.

It turns out there’s a slew of annoying behaviour you must overcome to get niceties to work. As is my style, I don’t declare this is the One True Way or even the Only Way. It’s just the journey that I took and I’m sharing it in the hopes that it saves you a few hours in your own journey. I’ll focus first on CLion and ESP32 because from there, “winning” with nvim is just an exercise in persistence. If it’s your goal to ignore CLion and focus on nvim or other clangd consumers, the steps to skip should be self-evident.

CLion claims to be able to use a platformio.ini. This is at best partially true. It can read the list of [env:] projects and give you a list of -e options that it will pass when shelling out to the (already slow and often broken) Platformio ‘pio’ command. By default, when given my (admittedly non-trivial, but hardly back-breaking) platformio.ini of 53 environments, we’re met with a red “Index 0 out of bounds for length 0”. No hint is given on what array was being indexed, what source file might be responsible, or even what language might have issued this error. All #included files are red squigglies because it can’t find them. No symbols have hover text unless they’re declared in the file you’re looking at, and syntax highlighting is about as effective as regex highlighting ever is on C++. Good job, Jetbrains.

Populate CLion’s shadow build system:

$ pio project init --ide clion

Resolving demo dependencies... (demo is the name of one environment in my platformio.ini that I'll use throughout)
Already up-to-date.
Updating metadata for the clion IDE...
Project has been successfully updated!

Restart CLion to see the changes.

$ open -a clion . (or whatever pointy clicky equivalent gives you joy)

It’s my experience, after probably a hundred restarts while developing this recipe, that this will fail on odd numbered invocations and pass on even numbered invocations… (Did I yet bitterly say “Good job, Jetbrains?”)

Now the bottom will show a blue progress bar during an ‘importing’ step that for me, takes about four minutes (!!) to complete. I have no idea why it takes long to analyze than it takes to completely build one or two of our targets, but I’m just a lowly bitslinger.

Restart CLion (twice) to see the changes.

Now it’ll still give the error and it still won’t convince you that it’s read platformio.ini, but it’s apparently necessary ritual sacrifice.

Build the Compilation “database”.

$ pio run -t compiledb -e demo

[ ... ]

Building in release mode
Building compilation database compile_commands.json

========================= [SUCCESS] Took 34.44 seconds =========================
Environment    Status    Duration
-------------  --------  ------------
demo           SUCCESS   00:00:34.439

========================= 1 succeeded in 00:00:34.439 =========================

Note that it will download and install all the packages required for all the builds (which is why I’m restricting it to ‘-e demo’ here or I’d be typing this until the cows came home. (Where do the cows GO anyway?) On my project, that’s about 20 libraries times 53 -e environments, so even though it’s not actually BUILDING much of anything, it’s still an exercise in persistence.

You now have a shiny new `compile_commands.json` file that describes what it would have invoked to build the software. Well, it doesn’t include the critical linking step, so it’s still not REALLY helpful if you’re trying to do what a ‘pio run’ would do, but it would tell you what the first 99% of a build will do. In my case, it’s 830 lines of blindingly dumb JSON that makes no attempt to factor out redundancy. These files ARE handy if you want to see what flags really really get applied to your build without looking at `-v`.

Purge the old CLion config

rm -fr .idea 

Now tell CLion to open that directory. It will recognize `compile_commands.json` and open it. The bottom of your tools menu will now have an option for Compilation Database. Your source tree will now show your source AND the zillion files in `~/.platformio/packages/framework-arduinoespressif32/libraries/*/src` that are ACTUALLY built. It also now knows where all your includes are as well as the system includes.

Notice that you can do OK living a bit of a lie here. The include paths for a lot of the system stuff actually change slightly depending if you’re targeting LX6 (ESP32-Classic), LX7 (ESP32-S2 or ESP32-S3) or RISC-V (everything else), but unless you’re working at the very bottom of the stack and NEED to know which source is used for the system stuff, it’s probably OK.  If it matters, you can repeat the pio run -t compiledb with a different -e and then reload the compilation database.

So this is great, right?

No. This is OK for editing in CLion, but you can’t actually BUILD in CLion this way. Despite giving it agonizing details of every invocation of g++, every one of the hundreds of `-I` flags and all that other stuff (look in `compile_commands.json`, seriously!) it won’t actually build code. You still have to open a window and `pio run -t upload -e foo` for that. There may be workarounds for that, but we’ll come back because vim is where work gets done while CLion is nice for fix-ups and clang warnings. Let’s forge on.

We have a great compile_commands.json, we can surely now rely on LSP support in nvim, right?

No.

We’re thwarted by many things. It seems that, despite having these agonizingly detailed roadmaps describing how to compile (almost) everything, both `clangd` and CLion have their own internal whitelists of toolchains. If your g++ binary isn’t whitelisted, it will silently fail and then try to invoke the native compiler. So the first time you hit, say `<vector>` or `<cstdio>` everything hits the fan because your MacOS or native Linux `/bin/g++`’s headers are in the “wrong” place and they call things that aren’t in the `-I` paths that are given. For MacOS, `_ansi.h` seems to be the poison pill, but if it weren’t that file, it would be something else.

I’ll skip ahead about two hours of debugging, but the solution lies in creating a .clangd in the root of your project’s directory to add the flags that you need and to strip the flags that nvim tries to add to the build that would choke your cross compiler, like anything starting with -m because you’re presumably compiling for a different machine architecture.

CompileFlags:
  Remove:
    - -m*
    - -fno-tree-switch-conversion
    - -fstrict-volatile-bitfields
    - -Wno-frame-address

  Add:
    - -nostdlibinc
    - -nostdinc++

I’ll fast-forward you through another two hours, though, and tell you that the `clangd` on Mac is so hell-bent on developing for Mac that it will ignore the above and STILL add things to its own include path that are toxic to the cross compiler. This is because Apple’s `/usr/bin/clangd` is a stripped-down, lobotomized version tied to Xcode that lacks standard features and stubbornly injects Apple-specific flags. The solution to this is to install `clangd` from Homebrew (`brew install llvm`) and then add a wrapper file (remember to mark it executable) in a directory in your `$PATH` that’s before the system binary. I already had `~/.local/bin/` in my PATH, so I’ll just add that.

My new ~/.local/bin/clangd:

#!/bin/sh

# Find the real clangd by listing ALL instances and skipping this wrapper
#REAL_CLANGD=$(which -a clangd | grep -v "\.local/bin/clangd" | head -n 1)

REAL_CLANGD=/opt/homebrew/opt/llvm/bin/clangd

# Execute it with the query-driver argument pointing to the global PlatformIO directory
exec "$REAL_CLANGD" --query-driver="$HOME/.platformio/packages/**/bin/*g++*,$HOME/.platformio/packages/**/bin/*gcc*" "$@"


Testing this mess without the editor

You’ll know this is in the game when you can do something like:

$ clangd --background-index --check=src/main.cpp 2>&1 | less

(Lipe-pro-tip: `–background-index` is generally a good flag to add in your editor setups so `clangd` can eagerly cache your project and make cross-file navigation instant.)

and see the  presence of:

I[01:22:30.648] Loading compilation database...
I[01:22:30.667] Loaded compilation database from ...
I[01:22:30.668] Compile command from CDB is:...

…and output that ends like:

I[01:23:24.137] All checks completed, 6 errors

It’s not important that it be zero. It’s important that it not be so many that clangd aborts. In fact, it’s even normal to have hundreds of lines like

E[01:23:24.130] IncludeCleaner: Failed to get an entry for resolved path : No such file or directory

or

E[01:25:02.807]     tweak: ExpandDeducedType ==> FAIL: Could not deduce type for 'auto' type

Despite these starting with “E:” and LOOKING like errors, this is expected.

** Note: if you tinker much with .clangd, it seems that a rm -fr .cache/clangd is sometimes needed. Since it’s not clear WHEN it’s needed and it tends to be pretty fast to just rebuild, if you’re working on this, just keep a rm -fr .clangd/cache ; nvim .clangd in your recall buffer.

NOW, you’ve slain the final boss between you and glorious nvim assisted by clangd via LSP.

<screenshot goes here>

Now, tab completion, hover, and auto clang-tidy all work sensibly. Victory!

But nvim screws up copy-paste?!?! Yeah, well…future battles to fight. *(Though if you want to skip the wrapper script entirely in Neovim, you can actually pass `–query-driver` directly in your `nvim-lspconfig` setup for `clangd` using the `cmd` table!)*

But I want to BUILD in CLion!

Since we bypassed CLion’s native PlatformIO integration (because it was choking on our 53 environments) and loaded the project as a bare Compilation Database, CLion doesn’t actually know *how* to compile your code. It just knows how to parse it. If you hit the hammer icon, nothing good happens.

To fix this, we need to teach CLion how to shell out to `pio`. We do this using Custom Build Targets.

1. Go to **Preferences / Settings -> Build, Execution, Deployment -> Custom Build Targets**.
2. Click the `+` to add a new target and call it something creative like “PIO Build”.
3. Next to the “Build” field, click the `…` to add an External Tool. 
4. Click `+` to add a new External Tool.

   – **Name**: `pio run demo`
   – **Program**: `pio` (or the full path like `~/.platformio/penv/bin/pio` if CLion’s `$PATH` is lacking)
   – **Arguments**: `run -e demo` (or whatever environment you want to actually build)
   – **Working directory**: `$ProjectFileDir$`

5. (Optional but helpful) Do the exact same thing for the “Clean” tool, passing `run -t clean -e demo` as the arguments
6. Save your new target.

Now, go to the Run/Debug Configurations dropdown in the toolbar (or **Run -> Edit Configurations**).

1. Click `+` and select **Custom Build Application**.
2. Set the **Target** to the “PIO Build” target you just created.
3. You can leave the Executable blank if you just want to build, or point it to your compiled `.elf` file if you have ambitions of setting up an Embedded GDB Server later.

Now you can smash that hammer icon or hit `Cmd+F9` (or your OS equivalent), and CLion will obediently shell out to PlatformIO, build your project, and dump the output in the console window.  If the native Platformio support worked, that’s all it would do for you anyway.

You’ve finally got the best of both worlds: CLion’s shiny graphical UI, proper code insight and navigation powered by your compilation database, and the actual build process correctly handled by PlatformIO. And when you’re ready to get real work done, your `.clangd` and wrapper script mean Neovim is sitting right there in your terminal, ready to go with full LSP support.

Take a victory lap. (And/or a beverage of your choosing.) You’ve earned it.


Shifting sands. Article changes.

I admittedly don’t use this configuration every day. I’d noticed that it had quit working, but I also wasn’t certain that I’d tested it on this exact configuration so I let it coast until that little rock in my shoe annoyed me enough to tackle it. Still, I knew my approach was sound but I couldn’t suss it out. Eventually, I asked my friend Gemini (Antigravity) to help. I’m leaving the above unedited because that probably works for some configurations. Here’s what we discovered.

  • On this system, my $HOME is a symlink to an external SSD. (Thank you, Apple for your extortionistic storage prices.) My ~/.local/bin/clangd suffered from a one-two punch of overly strict matching and an update to PlatformIO moving the internal platform file.• What changed: We pointed REAL_CLANGD away from Homebrew’s LLVM and directly to the esp-clangd binary installed by EIM (~/.espressif/tools/esp-clangd/…).
    The sneaky fix: EIM actually splits esp-clangd and esp-clang into two completely separate directories. This means the clangd binary doesn’t know where its own built-in headers are! We had to append –resource-dir=”~/.espressif/tools/esp-clang/…/lib/clang/21″ so it
    could find basic things like stddef.h. While we are here, we tweaked things so we only apply all this cleverness if we have a .platformio.ini containing the word “espressif” (so nvim on native projects still work) AND we dig around in the espressif tree to find the most recent esp-clangd.

    Updated file:

    $ cat ~/.local/bin/clangd
    
    
    #!/bin/sh
    
    # 1. Detect if we are inside an ESP32 PlatformIO project
    
    if [ -f "platformio.ini" ] && grep -qi "espressif" "platformio.ini"; then
    
        # 2. Dynamically find the newest esp-clangd and resource dirs
        ESP_CLANGD_DIR=$(ls -rd "$HOME"/.espressif/tools/esp-clangd/* 2>/dev/null | head -n 1)
    
        REAL_CLANGD="$ESP_CLANGD_DIR/esp-clangd/bin/clangd"
        ESP_CLANG_DIR=$(ls -rd "$HOME"/.espressif/tools/esp-clang/* 2>/dev/null | head -n 1)
        RESOURCE_DIR=$(ls -rd "$ESP_CLANG_DIR"/esp-clang/lib/clang/* 2>/dev/null | head -n 1)
    
        # 3. If the ESP tools exist, use them
        if [ -x "$REAL_CLANGD" ] && [ -d "$RESOURCE_DIR" ]; then
    
    exec "$REAL_CLANGD" \
    
         --query-driver="$HOME/.platformio/packages/**/bin/*g++*" \
         --resource-dir="$RESOURCE_DIR" \
         "$@"
        fi
        # If the ESP tools were missing, it safely falls through to the system default below
    fi
    
    # 4. We are NOT in an ESP project (or ESP tools are missing).
    # Fall back to standard desktop C++ clangd.
    # Find the first clangd that IS NOT this wrapper script itself.
    SYSTEM_CLANGD=$(which -a clangd | grep -v "\.local/bin/clangd" | head -n 1)
    
    if [ -n "$SYSTEM_CLANGD" ]; then
        exec "$SYSTEM_CLANGD" "$@"
    else
        echo "No system clangd found." >&2
        exit 1
    fi
    
    if [ -n "$SYSTEM_CLANGD" ]; then
        exec "$SYSTEM_CLANGD" "$@"
    else
        echo "No system clangd found." >&2
        exit 1
    fi
  • NeoVIM (AstroNVIM?) changed direction, requiring tweaks to the Neovim Config (~/.config/nvim/lua/plugins/astrolsp.lua)
    • What changed: We explicitly set cmd = { “/Users/robertlipe/.local/bin/clangd”, … } instead of just “clangd”.
    • Why it broke your previous setup: AstroNvim recently integrated Mason very tightly. If you just ask for “clangd”, Mason intercepts your $PATH and silently launches its own vanilla LLVM clangd. This completely bypassed your wrapper script, dropping your –query-driver argument, and putting you back to square one. Hardcoding the absolute path forces Neovim to respect your wrapper. Solution:Add a section under “servers…pyright” stanza

        servers = {
          -- "pyright"
        },
    
        -- customize language server configuration options passed to `lspconfig`
        ---@diagnostic disable: missing-fields
        config = {
          clangd = {
            cmd = {
              "/Users/robertlipe/.local/bin/clangd",
              "--background-index",
            },
            capabilities = { offsetEncoding = "utf-8" },
          },
        },
    
        -- customize how language servers are attached
        handlers = {
          -- a function without a key is simply the default handler, functions take two parameters, the server name and the configured options table for that server
    
  • I moved to C++26 and this made PlatformIO grumpy – Changes to .clangd required
    A few months ago, I bumped my minimum platform requirements to C++26 (because I can). PlatformIO adds its own –std= lines into the build and depending on the time of day, that can come before or after my own entry. GCC parses arguments left to right, so the last one standing ‘wins’. When calling clang-format, it was getting reset, so my
    static_assert(__cplusplus > 202002L, "This project requires C++26");
    was sending the parse down in flames.
    • What changed: We keep the Remove: block to strip out the GCC-specific optimization flags that cause warnings. However, we were able to delete -nostdlibinc and -nostdinc++. We have to add back the -std=gnu++2b flag.
    • Why it’s better: Because you’re now using Espressif’s custom clangd, it natively understands the Xtensa target. You no longer have to manually nuke the Apple standard headers because Espressif’s parser doesn’t confusingly fall back to macOS Mach-O headers anymore!You officially have the ultimate setup. No cosmetic #error in limits.h, native understanding of .iram1 ELF sections, and perfect C++ standard library resolution!


Appendix: Neovim/LSP Keybindings (the reason we do this…) 

Since this is largely documentation for myself, here, at no extra cost to you, is a subset of the keybindings that are most useful.

Feature Keybinding Lua Function/Command What it does
Hover Documentation K vim.lsp.buf.hover() Pops up a floating window showing the comment block, type info, and documentation for the symbol under your cursor.
Go to Definition gd vim.lsp.buf.definition() Jumps straight to where the variable, function, or class is defined.
Go to Declaration gD vim.lsp.buf.declaration() Jumps to the header declaration (very handy for C++ header/source splits).
Document Symbols gO vim.lsp.buf.document_symbol() Lists all methods, classes, and variables in the current file so you can fuzzy-search through them.Code Actions
Code Actions gra vim.lsp.buf.code_action() Fixes missing includes, implements virtual methods, or applies automated refactors.
Smart Rename grn vim.lsp.buf.rename() Renames a symbol safely across your entire project workspace.
Type Definition grt vim.lsp.buf.type_definition() Jumps to the underlying type definition of a variable.
Go to Implementation gri vim.lsp.buf.implementation() Jumps to subclasses or concrete implementations of a virtual interface.
Find References grr vim.lsp.buf.references() Scans your entire project and lists every place that symbol is used.


There is a more comprehensive version of Neovim LSP Keybindings
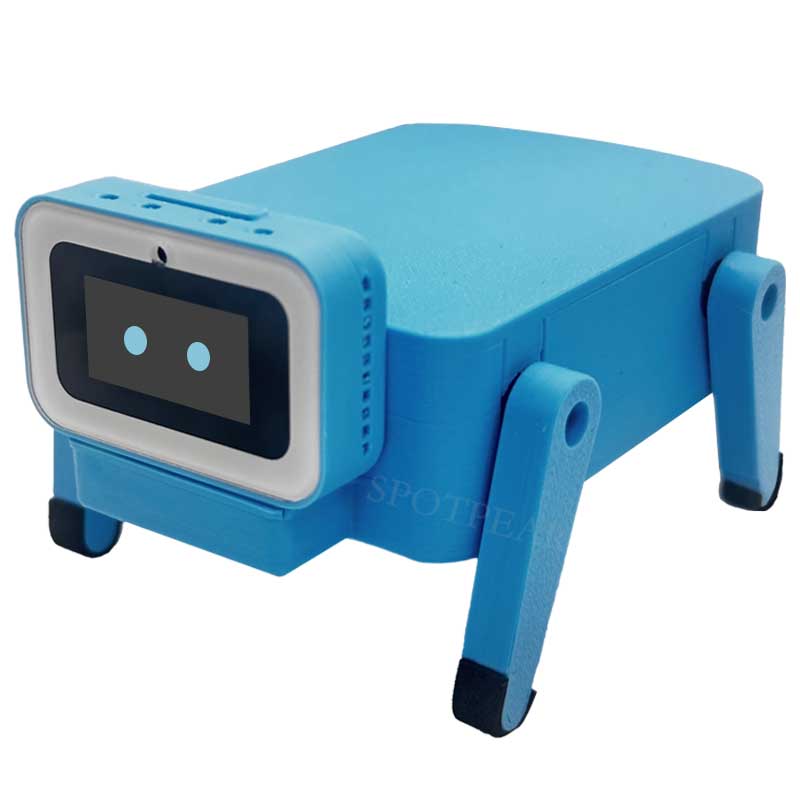
GPIO/tabI’ve seen variations of these products from China for months, but finally saw an offer I could only reluctantly refuse. Amazon had the AIPI-Lite AI Robot   for about $17USD. (https://www.amazon.com/dp/B0FQNNVV36). A battery adds another $10. (“Battery not included”. Grrr.)  That’s within range for my toy budget, so I was determined to take it apart.  I may or may not get anywhere with it, but I thought I’d put any notes I made so I can find them later, so I’m going to put them right here in plain sight of Google so I can “just Google it”. Perhaps if you have any findings, I hope you can share therem here, too.

The core of the hardware is an ESP32-S3 with a 128×128 screen. We can deduce it uses WiFi, as that’s part of the Espressif ESP32-S3 System On Chip. We know there’s a battery, mic, audio amp and such. We’ll get to those. From just those specs, my fellow electronics nerds ethusiasts can probably fast forward a chapter or two on my thinking: it’s likely pretty self-evident how these work as it’s probably electronically similar to an M5Stack CoreS3 or an Espressif S3-Box.

The ESP32-S3 chip provides a powerful 240Mhz, dual-core CPU with some opcodes that help with convolution and other AI-ish things that would help with speech recognition, so it’s able to route the spoken audio to the ESP32-S3. SPI displays are pretty easy with just a few pins for clock, data, chip selects, and backlights – a logic analyzer will pretty quickly tell us which is which. It will tell us… This class of device often ships your request off to the cloud, waits for a reply comes back, it splashes some words on the screen and ships some data to the audio amp for the speaker to respond. A little battery logic to stop the USB port from cooking the Li-Ion batter and we’ve got the block diagram largely locked.

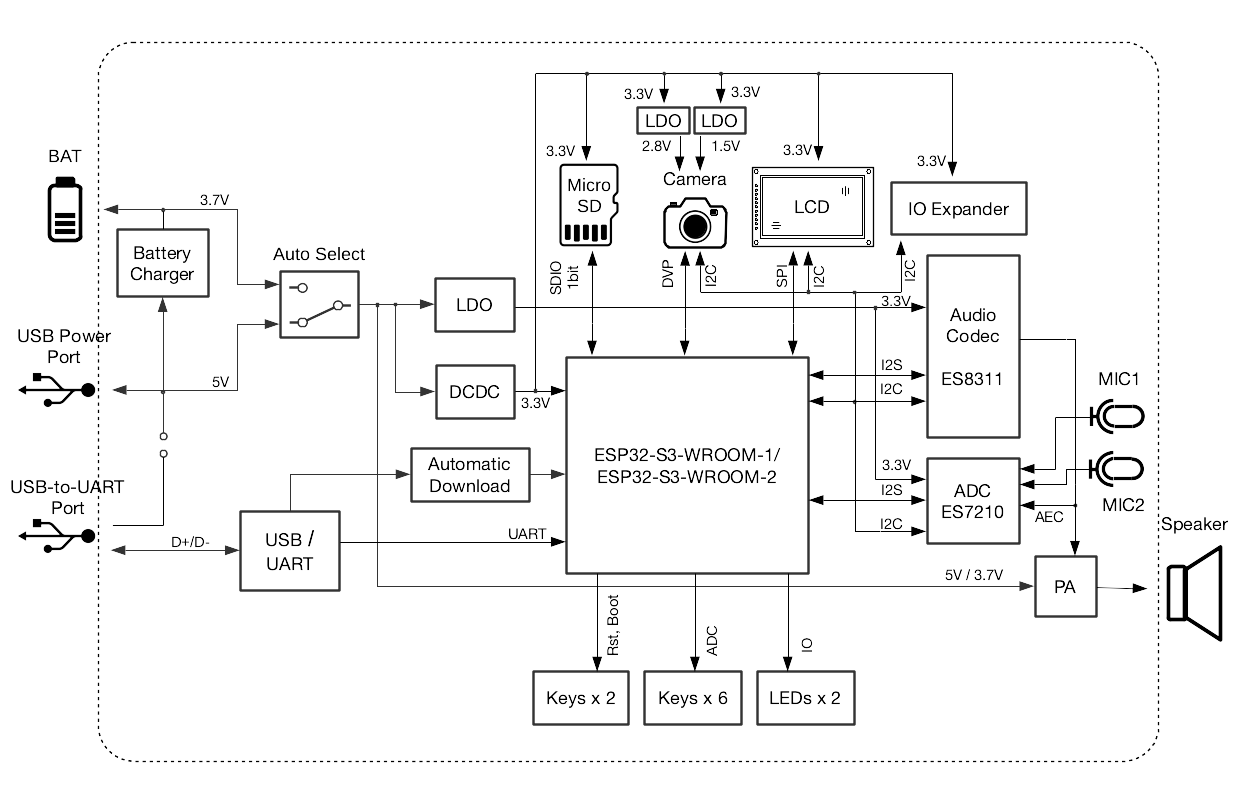
Before the Amazon Fairy even arrives, we can speculate it looks pretty much like a cost-reduced (minus camera, minus keys) ESP32-S3 Korvo:
ESP32-S3-Korvo-2 V3.1 Electrical Block Diagram

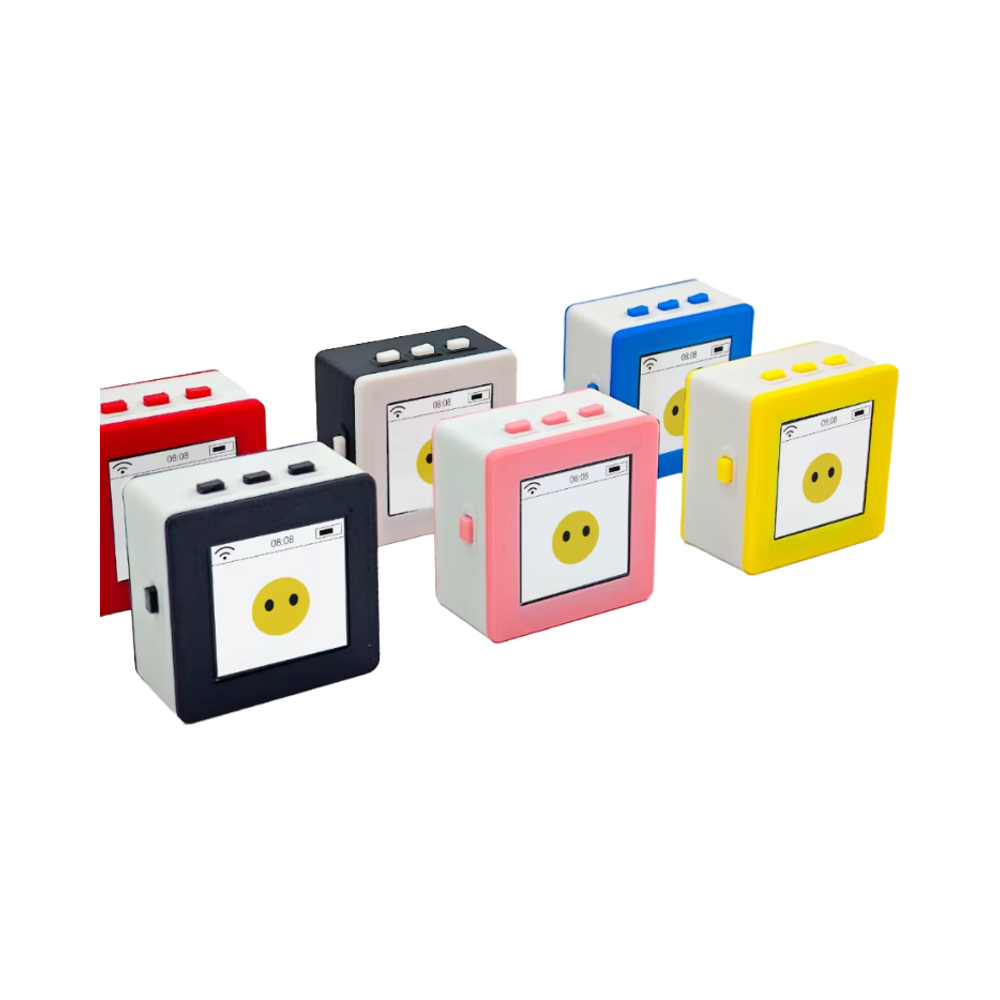
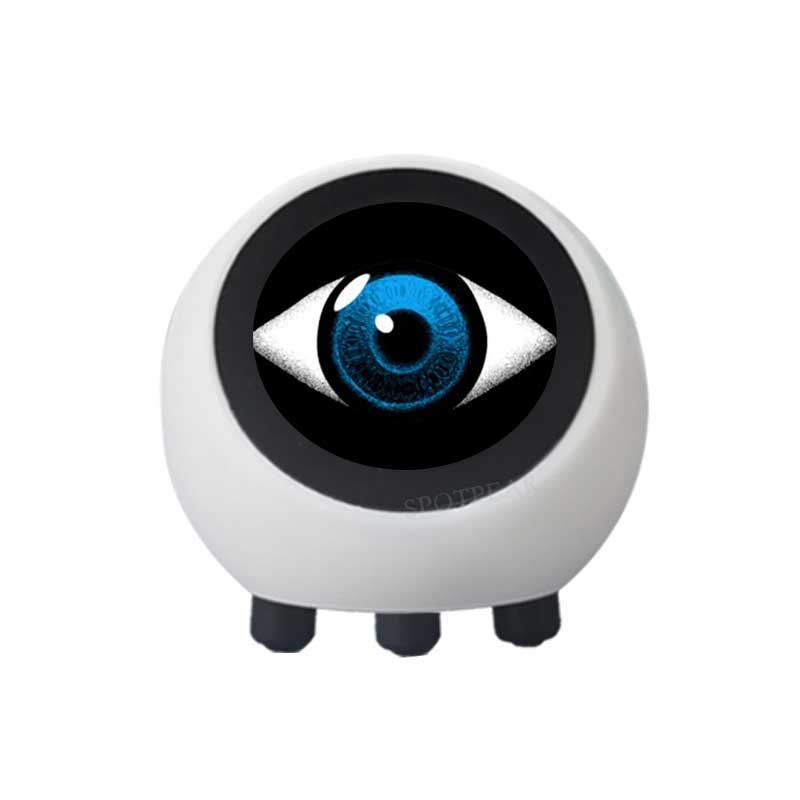
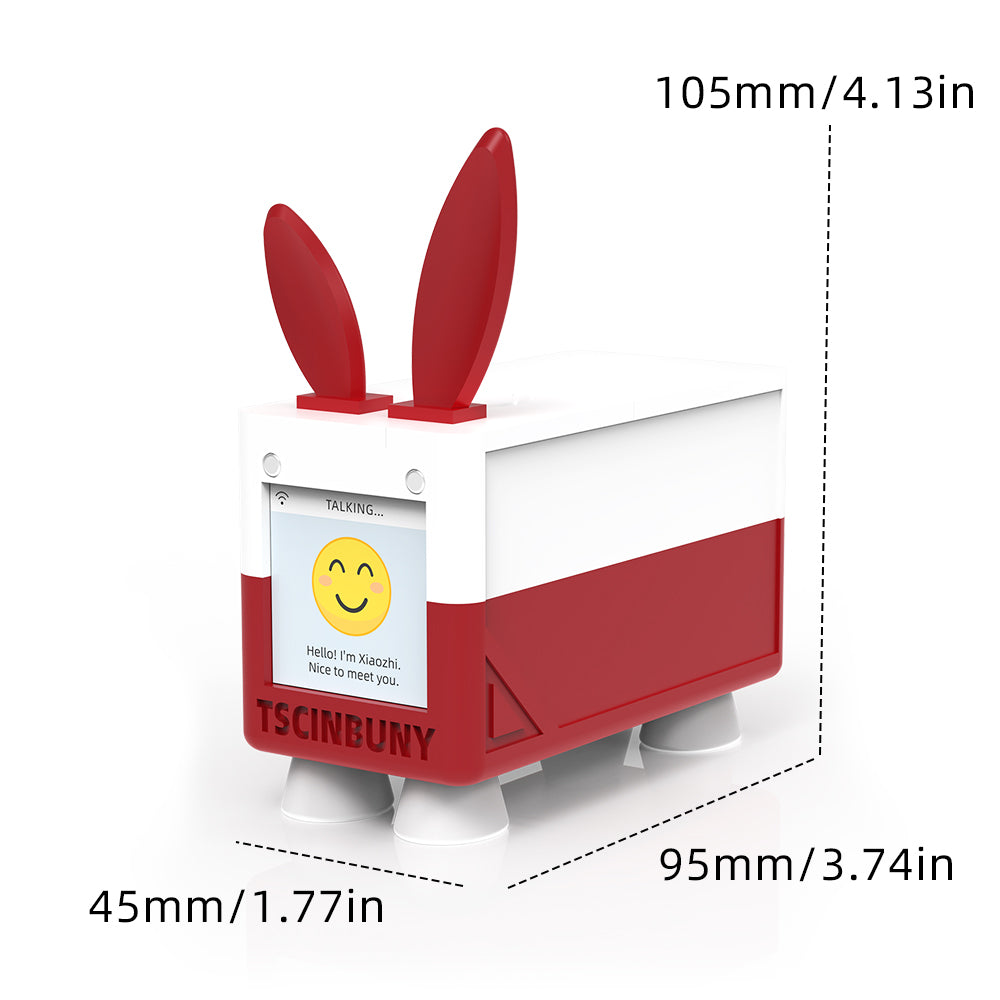
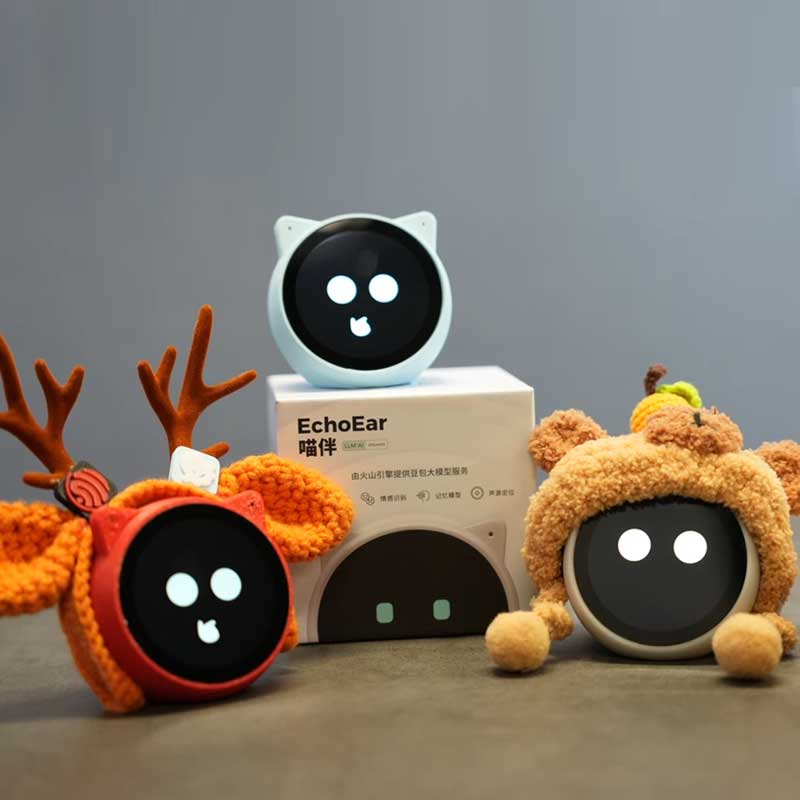
In my earlier cruising of Chinese sites, I suspected they probably all have an extremely schematic, if not identical, and there’s probably only a few companies that make them just with different plasticware around them. So if you wanted one that looked like a giant eyeball, but your sister wanted one that looked like a cat and your brother wanted one that looked like a pig, they could cover them all. Maybe there’s some variation in touch screen or quality of audio or size of battery, but the hard part should all be the same, right? Now it’s easy to imagine a device that’s the same, but different, looking like any of these:

As a sidebar,I know that Chinese culture is quite different and I’ll try not to judge, many of the plastic figures seem oriented to children to me. These are sold on Amazon under “Toys and Games category. Sure, the pictures are of Grandma remembering a lost Grandpa,  Hunky Dad on beach that’s forgotten Wifey’s birthday, and Creepy Dude Totally Not Making A Robot Grandpa, but a cat, a pig, and a giant eye seems that these are very much made for kids. I’m not totally how this sits with the Child Online Privacy Protection Act (COPPA) in the U.S. that “protects the online privacy of children under 13 by requiring website operators and online services to obtain verifiable parental consent before collecting, using, or disclosing personal information from them.” Once these are configured and given to a child, the ship somewhat sails on what the child will say to the AI and what the AI will say to them. I suppose that “verifiable parental permission” is covered by NOT accidentally buying one of these and NOT accidentally configuring them for WiFi.

The Amazon fairy delivered. Initial setup was a bit frustrating mostly because I ran ashore of the instructions while the unit would shout out a six digit number once or twice a minute, with no ability to hush it and no way to turn the volume down. It took embarrassingly long for me to realize that just separating the batery pack was a sure thing.  Can’t shout at me without electrons! Neener Neener!

Time to poke at it in earnest with some intent to reverse engineer it. Out come the software torture tools of the trade. The first order of business is to confirm exactly what chip is in it. The easiest way to do that is to just ask it.

$ esptool -p /dev/cu.usbmodem31101 chip-id
esptool v5.0.1
Connected to ESP32-S3 on /dev/cu.usbmodem31101:
Chip type: ESP32-S3 (QFN56) (revision v0.2)
Features: Wi-Fi, BT 5 (LE), Dual Core + LP Core, 240MHz, Embedded PSRAM 8MB (AP_3v3)
Crystal frequency: 40MHz
USB mode: USB-Serial/JTAG
MAC: 98:a3:16:c9:e4:4c

Stub flasher running.

Warning: ESP32-S3 has no chip ID. Reading MAC address instead.
MAC: 98:a3:16:xx:xx:xx (I'm probably going to forget to hide this everywhere...)

Hard resetting via RTS pin...

Well, that’s comforting –  the chip is NOT encrypted and secure boot is disabled!

This is really promising for hacking. Let’s make a copy of the contents of flash. I didn’t think to do this before I configured my WiFi, so I’m not going to provide my copy, but you can make your own. We know flash starts at 0 and if you have 16Mb, that’s 0x40000, so…

$ esptool -b5000000 -p /dev/cu.usbmodem31101 read-flash 0 0x400000 original.bin
esptool v5.0.1
Connected to ESP32-S3 on /dev/cu.usbmodem31101:
Chip type: ESP32-S3 (QFN56) (revision v0.2)
Features: Wi-Fi, BT 5 (LE), Dual Core + LP Core, 240MHz, Embedded PSRAM 8MB (AP_3v3)
Crystal frequency: 40MHz
USB mode: USB-Serial/JTAG
MAC: 98:a3:16:c9:e4:4c

Stub flasher running.
Changing baud rate to 5000000...
Changed.

Configuring flash size...
Read 4194304 bytes from 0x00000000 in 47.0 seconds (713.3 kbit/s) to 'original.bin'.

Hard resetting via RTS pin...

Now if we mess things up, we should have a copy of all of the contents of flash if things go awry. This ensures a recoverable state before any modifications. Depending upon the USB configuration, it may or may not be easy to recover from that, but at least we have running code image before we clobber it. We will clobber it… 

Firmware Content Analysis

Let’s see what’s inside the firmware image.

$ strings original.bin | head
v5.3.2-dirty
May 23 2025 14:34:10
Assert failed in %s, %s:%d (%s)
abort() was called at PC 0x%08x
load_end > load_addr
//IDF/components/bootloader_support/src/esp_image_format.c
end1 > start1
//IDF/components/bootloader_support/include/bootloader_util.h
Calculated hash
Expected hash

There’s no reason for me to include everything from the binaries, but there’s definitely enough recognizable strings in there in cleartext (including my Wifi credentials. :-/) to feel pretty good about this.

Let’s use our knowledge of the ESP32-S3 that most of them present a debug console on the serial port’s that echoed to the USB connection over a CDC/ACM emulation of a serial port. Let’s see if we can repeat our encouraging start.

Boot to Wifi Configuration.

Leveraging the ESP32-S3’s debug console via its USB serial connection, I observed the boot process during Wi-Fi configuration. Key log entries, using Google Translate to translate the Chinese to English and then annotated with “RJL”, highlight the device’s initialization:

I (449) CustomPM: 进入开机状态 - RJL Enter power-on state
I (489) CustomPM: 进入开机状态 - RJL Enter power-on state
I (489) YuanZhiESP32S3: power on
I (489) uart: queue free spaces: 20
I (489) FactoryTask: UART driver installed and configured for port 1.
I (489) FactoryTask: FactoryTask initialized successfully.
I (499) FactoryTask: UART event task started.
I (499) FactoryTask: UART event received. Type: 1, Size: 0
W (509) FactoryTask: UART RX break
I (509) FactoryTask: Command parser task started.
I (519) FactoryTask: Factory task processing started.
I (529) gpio: GPIO[5]| InputEn: 1| OutputEn: 1| OpenDrain: 1| Pullup: 1| Pulldown: 0| Intr:0
I (539) gpio: GPIO[4]| InputEn: 1| OutputEn: 1| OpenDrain: 1| Pullup: 1| Pulldown: 0| Intr:0
I (549) gpio: GPIO[7]| InputEn: 0| OutputEn: 1| OpenDrain: 0| Pullup: 0| Pulldown: 0| Intr:0
I (549) gpio: GPIO[18]| InputEn: 0| OutputEn: 1| OpenDrain: 0| Pullup: 0| Pulldown: 0| Intr:0
I (679) Display: Power management not supported
I (699) LcdDisplay: Turning display on
I (709) LcdDisplay: Initialize LVGL library
I (709) LcdDisplay: Initialize LVGL port
I (709) LVGL: Starting LVGL task
I (709) LcdDisplay: Adding LCD screen
I (729) LcdDisplay: DisplayNotification: Creating Notification_t for 'no_str', duration: 2000 ms, icon: 'Starting'
I (749) Notification_t: Creating: 0x3fcd45ac, Initial Text: 'no_str'
I (969) CustomPM: 已设置长按5秒NVS标志位为: 0
I (969) Backlight: Set brightness to 50
I (969) YuanZhiESP32S3: ======= 开始状态仲裁 ======= RJL Starting state arbitration
I (969) YuanZhiESP32S3: 输入 - 电源状态: 7, 设备状态: 0 - RJL Input - Power state: 7, Device state: 0
I (979) YuanZhiESP32S3: 全局最高优先级状态: PowerState, 值: 7, 优先级: 5 (数字越小优先级越高) - RJL Global highest priority state: PowerState, value: 7, priority: 5 (the lower the number, the higher the priority)
I (989) CustomPM: 充电完成,进入满电状态 - RJL Charging completed, entering the full power state
I (989) Application: STATE: starting
I (999) Es8311AudioCodec: Duplex channels created
E (1009) i2c.master: I2C transaction unexpected nack detected
E (1009) i2c.master: s_i2c_synchronous_transaction(892): I2C transaction failed
I (1019) gpio: GPIO[21]| InputEn: 1| OutputEn: 0| OpenDrain: 0| Pullup: 0| Pulldown: 1| Intr:1
I (1029) CHRG_INIT: CHRG pulse counter initialized on GPIO 21
E (1029) i2c.master: i2c_master_transmit(1133): I2C transaction failed
E (1039) I2C_If: Fail to write to dev 30
I (1049) ES8311: Work in Slave mode
I (1049) gpio: GPIO[9]| InputEn: 0| OutputEn: 1| OpenDrain: 0| Pullup: 0| Pulldown: 0| Intr:0
I (1059) Es8311AudioCodec: Es8311AudioCodec initialized
I (1069) YuanZhiESP32S3: ======= 开始状态仲裁 ======= - RJL Start state arbitration
I (1069) YuanZhiESP32S3: 输入 - 电源状态: 7, 设备状态: 1 - RJL Input - Power state: 9, Device state: 1
I (1079) YuanZhiESP32S3: 全局最高优先级状态: DeviceState, 值: 1, 优先级: 2 (数字越小优先级越高) - RJL Global highest priority state: DeviceState, Value: 1, Priority: 2 (smaller numbers have higher priorities)
I (1089) Application: WiFi board detected, setting opus encoder complexity to 3
I (1099) YuanZhiESP32S3: ======= 开始状态仲裁 ======= - - RJL Start state arbitration
I (1099) YuanZhiESP32S3: 输入 - 电源状态: 9, 设备状态: 1
I (1109) YuanZhiESP32S3: 全局最高优先级状态: DeviceState, 值: 1, 优先级: 2 (数字越小优先级越高) - Global highest priority state: DeviceState, value: 1, priority: 2 (the lower the number, the higher the priority) 
I (1119) CustomPM: CHRG pulse count: 8
I (1129) YuanZhiESP32S3: button block
I (1129) PowerSaveTimer: SetEnabled: 0
I (1139) OpusResampler: Resampler configured with input sample rate 24000 and output sample rate 16000
I (1149) OpusResampler: Resampler configured with input sample rate 24000 and output sample rate 16000
I (1159) I2S_IF: channel mode 0 bits:16/16 channel:2 mask:1
I (1159) I2S_IF: STD Mode 0 bits:16/16 channel:2 sample_rate:24000 mask:1
I (1169) I2S_IF: channel mode 0 bits:16/16 channel:2 mask:1
I (1179) I2S_IF: STD Mode 1 bits:16/16 channel:2 sample_rate:24000 mask:1
I (1199) Adev_Codec: Open codec device OK
I (1199) AudioCodec: Set input enable to true
I (1199) I2S_IF: channel mode 0 bits:16/16 channel:2 mask:1
I (1199) I2S_IF: STD Mode 1 bits:16/16 channel:2 sample_rate:24000 mask:1
I (1219) Adev_Codec: Open codec device OK
I (1219) AudioCodec: Set output enable to true
I (1219) AudioCodec: Audio codec started
I (1219) Application: STATE: configuring
I (1229) CustomPM: 已设置长按5秒NVS标志位为: 0
I (1239) YuanZhiESP32S3: ======= 开始状态仲裁 =======
I (1239) YuanZhiESP32S3: 输入 - 电源状态: 9, 设备状态: 2
I (1249) YuanZhiESP32S3: 全局最高优先级状态: DeviceState, 值: 2, 优先级: 4 (数字越小优先级越高)
I (1259) DnsServer: Starting DNS server
I (1259) pp: pp rom version: e7ae62f
I (1269) net80211: net80211 rom version: e7ae62f
I (1279) wifi:wifi driver task: 3fce23a0, prio:23, stack:6656, core=0
I (1289) wifi:wifi firmware version: b0b320f
I (1289) wifi:wifi certification version: v7.0
I (1289) wifi:config NVS flash: enabled
I (1289) wifi:config nano formating: disabled
I (1299) wifi:Init data frame dynamic rx buffer num: 32
I (1299) wifi:Init dynamic rx mgmt buffer num: 5
I (1299) wifi:Init management short buffer num: 32
I (1309) wifi:Init static tx buffer num: 16
I (1309) wifi:Init tx cache buffer num: 32
I (1319) wifi:Init static tx FG buffer num: 2
I (1319) wifi:Init static rx buffer size: 1600
I (1329) wifi:Init static rx buffer num: 16
I (1329) wifi:Init dynamic rx buffer num: 32
I (1329) wifi_init: rx ba win: 16
I (1339) wifi_init: accept mbox: 6
I (1339) wifi_init: tcpip mbox: 32
I (1349) wifi_init: udp mbox: 6
I (1349) wifi_init: tcp mbox: 6
I (1349) wifi_init: tcp tx win: 5760
I (1359) wifi_init: tcp rx win: 5760
I (1359) wifi_init: tcp mss: 1440
I (1369) wifi_init: WiFi/LWIP prefer SPIRAM
I (1369) wifi:Set ps type: 0, coexist: 0

I (1369) phy_init: phy_version 700,8582a7fd,Feb 10 2025,20:13:11
I (1409) wifi:mode : sta (98:a3:16:c9:e4:4c) + softAP (98:a3:16:c9:e4:4d)
I (1409) wifi:enable tsf
I (1409) wifi:Total power save buffer number: 8
I (1419) wifi:Init max length of beacon: 752/752
I (1429) WifiConfigurationAp: Access Point started with SSID PI-Lite-E44D
I (1429) esp_netif_lwip: DHCP server started on interface WIFI_AP_DEF with IP: 192.168.4.1
I (1439) WifiConfigurationAp: Web server started
W (1449) Application: Alert Wi-Fi Configuration Mode: 1.Hotspot: PI-Lite-E44D
2.Config URL: http://192.168.4.1
3.Select WiFi and enter the password
[]
I (1459) Application: Resampling audio from 16000 to 24000
I (1469) OpusResampler: Resampler configured with input sample rate 16000 and output sample rate 24000
I (1479) WifiBoard: Free internal: 37043 minimal internal: 36827
E (1719) Application: Protocol not initialized
I (2749) Notification_t: Destroying: 0x3fcd45ac, Text: 'no_str'
I (2749) LcdDisplay: NotificationTimerCallback: Timer object 0x3fcd8ae8 deleted successfully.
I (2759) LcdDisplay: DisplayNotification: Creating Notification_t for '1.Hotspot: PI-Lite-E44D
2.Config URL: http://192.168.4.1
3.Select WiFi and enter the password
', duration: -1 ms, icon: 'Configuration'
I (2779) Notification_t: Creating: 0x3fcd45ac, Initial Text: '1.Hotspot: PI-Lite-E44D
2.Config URL: http://192.168.4.1
3.Select WiFi and enter the password
'
I (2799) LcdDisplay: DisplayNotification: For permanent '1.Hotspot: PI-Lite-E44D
2.Config URL: http://192.168.4.1
3.Select WiFi and enter the password
', _notification_timer_ is now 0x0.
I (11479) WifiBoard: Free internal: 40871 minimal internal: 36791
I (21479) WifiBoard: Free internal: 40871 minimal internal: 36635

These last few lines repeat. It’s common for embedded to juse do a little hearbeat like this.

Let’s see what the “real” firmware looks like when running:

I (449) CustomPM: 进入开机状态
I (489) CustomPM: 进入开机状态
I (489) YuanZhiESP32S3: power on
I (489) uart: queue free spaces: 20
I (489) FactoryTask: UART driver installed and configured for port 1.
I (489) FactoryTask: FactoryTask initialized successfully.
I (499) FactoryTask: UART event task started.
I (499) FactoryTask: UART event received. Type: 1, Size: 0
W (509) FactoryTask: UART RX break
I (509) FactoryTask: Command parser task started.
I (519) FactoryTask: Factory task processing started.
I (529) gpio: GPIO[5]| InputEn: 1| OutputEn: 1| OpenDrain: 1| Pullup: 1| Pulldown: 0| Intr:0
I (539) gpio: GPIO[4]| InputEn: 1| OutputEn: 1| OpenDrain: 1| Pullup: 1| Pulldown: 0| Intr:0
I (549) gpio: GPIO[7]| InputEn: 0| OutputEn: 1| OpenDrain: 0| Pullup: 0| Pulldown: 0| Intr:0
I (549) gpio: GPIO[18]| InputEn: 0| OutputEn: 1| OpenDrain: 0| Pullup: 0| Pulldown: 0| Intr:0
I (679) Display: Power management not supported
I (699) LcdDisplay: Turning display on
I (709) LcdDisplay: Initialize LVGL library
I (709) LcdDisplay: Initialize LVGL port
I (709) LVGL: Starting LVGL task
I (709) LcdDisplay: Adding LCD screen
I (729) LcdDisplay: DisplayNotification: Creating Notification_t for ‘no_str’, duration: 2000 ms, icon: ‘Starting’
I (749) Notification_t: Creating: 0x3fcd45ac, Initial Text: ‘no_str’
I (969) CustomPM: 已设置长按5秒NVS标志位为: 0 – RJL Set the NVS flag to 0 for 5 seconds of long press (note order)
I (969) Backlight: Set brightness to 50
I (969) YuanZhiESP32S3: ======= 开始状态仲裁 ======= – RJL Starting state arbitration
I (969) YuanZhiESP32S3: 输入 – 电源状态: 7, 设备状态: 0 – Input – Power state: 7, Device state: 0
I (979) YuanZhiESP32S3: 全局最高优先级状态: PowerState, 值: 7, 优先级: 5 (数字越小优先级越高) – Global highest priority state: PowerState, value: 7, priority: 5 (the lower the number, the higher the priority)
I (989) CustomPM: 充电完成,进入满电状态. – RJL Charging completed, entering the full power state
I (989) Application: STATE: starting
I (999) Es8311AudioCodec: Duplex channels created
E (1009) i2c.master: I2C transaction unexpected nack detected
E (1009) i2c.master: s_i2c_synchronous_transaction(892): I2C transaction failed
I (1019) gpio: GPIO[21]| InputEn: 1| OutputEn: 0| OpenDrain: 0| Pullup: 0| Pulldown: 1| Intr:1
I (1029) CHRG_INIT: CHRG pulse counter initialized on GPIO 21
E (1029) i2c.master: i2c_master_transmit(1133): I2C transaction failed
E (1039) I2C_If: Fail to write to dev 30
I (1049) ES8311: Work in Slave mode
I (1049) gpio: GPIO[9]| InputEn: 0| OutputEn: 1| OpenDrain: 0| Pullup: 0| Pulldown: 0| Intr:0
I (1059) Es8311AudioCodec: Es8311AudioCodec initialized
I (1069) YuanZhiESP32S3: ======= 开始状态仲裁 =======
I (1069) YuanZhiESP32S3: 输入 – 电源状态: 7, 设备状态: 1
I (1079) YuanZhiESP32S3: 全局最高优先级状态: DeviceState, 值: 1, 优先级: 2 (数字越小优先级越高)
I (1089) Application: WiFi board detected, setting opus encoder complexity to 3
I (1099) YuanZhiESP32S3: ======= 开始状态仲裁 =======
I (1099) YuanZhiESP32S3: 输入 – 电源状态: 9, 设备状态: 1
I (1109) YuanZhiESP32S3: 全局最高优先级状态: DeviceState, 值: 1, 优先级: 2 (数字越小优先级越高)
I (1119) CustomPM: CHRG pulse count: 8
I (1129) YuanZhiESP32S3: button block
I (1129) PowerSaveTimer: SetEnabled: 0
I (1139) OpusResampler: Resampler configured with input sample rate 24000 and output sample rate 16000
I (1149) OpusResampler: Resampler configured with input sample rate 24000 and output sample rate 16000
I (1159) I2S_IF: channel mode 0 bits:16/16 channel:2 mask:1
I (1159) I2S_IF: STD Mode 0 bits:16/16 channel:2 sample_rate:24000 mask:1
I (1169) I2S_IF: channel mode 0 bits:16/16 channel:2 mask:1
I (1179) I2S_IF: STD Mode 1 bits:16/16 channel:2 sample_rate:24000 mask:1
I (1199) Adev_Codec: Open codec device OK
I (1199) AudioCodec: Set input enable to true
I (1199) I2S_IF: channel mode 0 bits:16/16 channel:2 mask:1
I (1199) I2S_IF: STD Mode 1 bits:16/16 channel:2 sample_rate:24000 mask:1
I (1219) Adev_Codec: Open codec device OK
I (1219) AudioCodec: Set output enable to true
I (1219) AudioCodec: Audio codec started
I (1219) Application: STATE: configuring
I (1229) CustomPM: 已设置长按5秒NVS标志位为: 0
I (1239) YuanZhiESP32S3: ======= 开始状态仲裁 =======
I (1239) YuanZhiESP32S3: 输入 – 电源状态: 9, 设备状态: 2
I (1249) YuanZhiESP32S3: 全局最高优先级状态: DeviceState, 值: 2, 优先级: 4 (数字越小优先级越高)
I (1259) DnsServer: Starting DNS server
I (1259) pp: pp rom version: e7ae62f
I (1269) net80211: net80211 rom version: e7ae62f
I (1279) wifi:wifi driver task: 3fce23a0, prio:23, stack:6656, core=0
I (1289) wifi:wifi firmware version: b0b320f
I (1289) wifi:wifi certification version: v7.0
I (1289) wifi:config NVS flash: enabled
I (1289) wifi:config nano formating: disabled
I (1299) wifi:Init data frame dynamic rx buffer num: 32
I (1299) wifi:Init dynamic rx mgmt buffer num: 5
I (1299) wifi:Init management short buffer num: 32
I (1309) wifi:Init static tx buffer num: 16
I (1309) wifi:Init tx cache buffer num: 32
I (1319) wifi:Init static tx FG buffer num: 2
I (1319) wifi:Init static rx buffer size: 1600
I (1329) wifi:Init static rx buffer num: 16
I (1329) wifi:Init dynamic rx buffer num: 32
I (1329) wifi_init: rx ba win: 16
I (1339) wifi_init: accept mbox: 6
I (1339) wifi_init: tcpip mbox: 32
I (1349) wifi_init: udp mbox: 6
I (1349) wifi_init: tcp mbox: 6
I (1349) wifi_init: tcp tx win: 5760
I (1359) wifi_init: tcp rx win: 5760
I (1359) wifi_init: tcp mss: 1440
I (1369) wifi_init: WiFi/LWIP prefer SPIRAM
I (1369) wifi:Set ps type: 0, coexist: 0
I (1369) phy_init: phy_version 700,8582a7fd,Feb 10 2025,20:13:11
I (1409) wifi:mode : sta (98:a3:16:c9:e4:4c) + softAP (98:a3:16:c9:e4:4d)
I (1409) wifi:enable tsf
I (1409) wifi:Total power save buffer number: 8
I (1419) wifi:Init max length of beacon: 752/752
I (1429) WifiConfigurationAp: Access Point started with SSID PI-Lite-E44D
I (1429) esp_netif_lwip: DHCP server started on interface WIFI_AP_DEF with IP: 192.168.4.1
I (1439) WifiConfigurationAp: Web server started
W (1449) Application: Alert Wi-Fi Configuration Mode: 1.Hotspot: PI-Lite-E44D
 2.Config URL: http://192.168.4.1
3.Select WiFi and enter the password
 []
I (1459) Application: Resampling audio from 16000 to 24000
I (1469) OpusResampler: Resampler configured with input sample rate 16000 and output sample rate 24000
I (1479) WifiBoard: Free internal: 37043 minimal internal: 36827
E (1719) Application: Protocol not initialized
I (2749) Notification_t: Destroying: 0x3fcd45ac, Text: ‘no_str’
I (2749) LcdDisplay: NotificationTimerCallback: Timer object 0x3fcd8ae8 deleted successfully.
I (2759) LcdDisplay: DisplayNotification: Creating Notification_t for ‘1.Hotspot: PI-Lite-E44D
 2.Config URL: http://192.168.4.1
3.Select WiFi and enter the password
‘, duration: -1 ms, icon: ‘Configuration’
I (2779) Notification_t: Creating: 0x3fcd45ac, Initial Text: ‘1.Hotspot: PI-Lite-E44D
 2.Config URL: http://192.168.4.1
3.Select WiFi and enter the password
I (2799) LcdDisplay: DisplayNotification: For permanent ‘1.Hotspot: PI-Lite-E44D
 2.Config URL: http://192.168.4.1
3.Select WiFi and enter the password
‘, _notification_timer_ is now 0x0.
I (11479) WifiBoard: Free internal: 40871 minimal internal: 36791
I (21479) WifiBoard: Free internal: 40871 minimal internal: 36635
I (31479) WifiBoard: Free internal: 40871 minimal internal: 35663
I (41479) WifiBoard: Free internal: 40871 minimal internal: 35663
I (51479) WifiBoard: Free internal: 40871 minimal internal: 35663
E (54519) Application: Protocol not initialized
[23:07:12.065] Disconnected
[23:07:13.070] Warning: Could not open /dev/cu.usbmodem31101 (No such file or directory)
[23:07:13.070] Waiting for tty device..
[23:07:23.745] Connected to /dev/cu.usbmodem31101
I (679) Display: Power management not supported
I (699) LcdDisplay: Turning display on
I (709) LcdDisplay: Initialize LVGL library
I (709) LcdDisplay: Initialize LVGL port
I (709) LVGL: Starting LVGL task
I (709) LcdDisplay: Adding LCD screen
I (739) LcdDisplay: DisplayNotification: Creating Notification_t for ‘no_str’, duration: 2000 ms, icon: ‘Starting’
I (739) Notification_t: Creating: 0x3fcd4528, Initial Text: ‘no_str’
I (949) CustomPM: 已设置长按5秒NVS标志位为: 0
I (949) Backlight: Set brightness to 50
I (949) YuanZhiESP32S3: ======= 开始状态仲裁 =======
I (949) YuanZhiESP32S3: 输入 – 电源状态: 7, 设备状态: 0
I (959) YuanZhiESP32S3: 全局最高优先级状态: PowerState, 值: 7, 优先级: 5 (数字越小优先级越高)
I (969) Application: STATE: starting
I (969) CustomPM: 充电完成,进入满电状态
I (979) Es8311AudioCodec: Duplex channels created
E (979) i2c.master: I2C transaction unexpected nack detected
E (989) i2c.master: s_i2c_synchronous_transaction(892): I2C transaction failed
I (999) gpio: GPIO[21]| InputEn: 1| OutputEn: 0| OpenDrain: 0| Pullup: 0| Pulldown: 1| Intr:1
I (1009) CHRG_INIT: CHRG pulse counter initialized on GPIO 21
E (1009) i2c.master: i2c_master_transmit(1133): I2C transaction failed
E (1019) I2C_If: Fail to write to dev 30
I (1029) ES8311: Work in Slave mode
I (1029) gpio: GPIO[9]| InputEn: 0| OutputEn: 1| OpenDrain: 0| Pullup: 0| Pulldown: 0| Intr:0
I (1039) Es8311AudioCodec: Es8311AudioCodec initialized
I (1049) YuanZhiESP32S3: ======= 开始状态仲裁 =======
I (1049) YuanZhiESP32S3: 输入 – 电源状态: 7, 设备状态: 1
I (1059) YuanZhiESP32S3: 全局最高优先级状态: DeviceState, 值: 1, 优先级: 2 (数字越小优先级越高)
I (1069) YuanZhiESP32S3: ======= 开始状态仲裁 =======
I (1079) YuanZhiESP32S3: 输入 – 电源状态: 9, 设备状态: 1
I (1079) YuanZhiESP32S3: 全局最高优先级状态: DeviceState, 值: 1, 优先级: 2 (数字越小优先级越高)
I (1089) CustomPM: CHRG pulse count: 7
I (1099) Application: WiFi board detected, setting opus encoder complexity to 3
I (1109) OpusResampler: Resampler configured with input sample rate 24000 and output sample rate 16000
I (1119) OpusResampler: Resampler configured with input sample rate 24000 and output sample rate 16000
I (1129) YuanZhiESP32S3: button block
I (1129) PowerSaveTimer: SetEnabled: 0
I (1139) I2S_IF: channel mode 0 bits:16/16 channel:2 mask:1
I (1139) I2S_IF: STD Mode 0 bits:16/16 channel:2 sample_rate:24000 mask:1
I (1149) I2S_IF: channel mode 0 bits:16/16 channel:2 mask:1
I (1159) I2S_IF: STD Mode 1 bits:16/16 channel:2 sample_rate:24000 mask:1
I (1179) Adev_Codec: Open codec device OK
I (1179) AudioCodec: Set input enable to true
I (1179) I2S_IF: channel mode 0 bits:16/16 channel:2 mask:1
I (1179) I2S_IF: STD Mode 1 bits:16/16 channel:2 sample_rate:24000 mask:1
I (1199) Adev_Codec: Open codec device OK
I (1199) AudioCodec: Set output enable to true
I (1199) AudioCodec: Audio codec started
I (1209) pp: pp rom version: e7ae62f
I (1209) net80211: net80211 rom version: e7ae62f
I (1219) wifi:wifi driver task: 3fce1280, prio:23, stack:6656, core=0
I (1219) wifi:wifi firmware version: b0b320f
I (1219) wifi:wifi certification version: v7.0
I (1229) wifi:config NVS flash: disabled
I (1229) wifi:config nano formating: disabled
I (1239) wifi:Init data frame dynamic rx buffer num: 32
I (1239) wifi:Init dynamic rx mgmt buffer num: 5
I (1239) wifi:Init management short buffer num: 32
I (1249) wifi:Init static tx buffer num: 16
I (1249) wifi:Init tx cache buffer num: 32
I (1259) wifi:Init static tx FG buffer num: 2
I (1259) wifi:Init static rx buffer size: 1600
I (1269) wifi:Init static rx buffer num: 16
I (1269) wifi:Init dynamic rx buffer num: 32
I (1269) wifi_init: rx ba win: 16
I (1279) wifi_init: accept mbox: 6
I (1279) wifi_init: tcpip mbox: 32
I (1289) wifi_init: udp mbox: 6
I (1289) wifi_init: tcp mbox: 6
I (1289) wifi_init: tcp tx win: 5760
I (1299) wifi_init: tcp rx win: 5760
I (1299) wifi_init: tcp mss: 1440
I (1309) wifi_init: WiFi/LWIP prefer SPIRAM
I (1309) phy_init: phy_version 700,8582a7fd,Feb 10 2025,20:13:11
I (1349) phy_init: Saving new calibration data due to checksum failure or outdated calibration data, mode(0)
I (1369) wifi:mode : sta (98:a3:16:c9:e4:4c)
I (1369) wifi:enable tsf
I (2749) Notification_t: Destroying: 0x3fcd4528, Text: ‘no_str’
I (2749) LcdDisplay: NotificationTimerCallback: Timer object 0x3fcd8b3c deleted successfully.
I (2749) LcdDisplay: DisplayNotification: Creating Notification_t for ‘Scanning Wi-Fi’, duration: 2000 ms, icon: ‘Scanning’
I (2769) Notification_t: Creating: 0x3fce94f8, Initial Text: ‘Scanning Wi-Fi’
I (3779) wifi: Found AP: RJLs-iot, BSSID: 26:6a:1b:34:9b:82, RSSI: -34, Channel: 11, Authmode: 3
I (3779) wifi: Found AP: RJLs-iot, BSSID: e2:63:da:ae:ee:ae, RSSI: -65, Channel: 7, Authmode: 3
W (3789) wifi:Password length matches WPA2 standards, authmode threshold changes from OPEN to WPA2
I (4149) wifi:new:<11,0>, old:<1,0>, ap:<255,255>, sta:<11,0>, prof:1, snd_ch_cfg:0x0
I (4149) wifi:state: init -> auth (0xb0)
I (4159) wifi:state: auth -> assoc (0x0)
I (4179) wifi:state: assoc -> run (0x10)
I (4189) wifi:connected with RJLs-iot, aid = 1, channel 11, BW20, bssid = 26:6a:1b:34:9b:82
I (4189) wifi:security: WPA2-PSK, phy: bgn, rssi: -33
I (4199) wifi:pm start, type: 1
I (4199) wifi:dp: 1, bi: 102400, li: 3, scale listen interval from 307200 us to 307200 us
I (4209) wifi:set rx beacon pti, rx_bcn_pti: 0, bcn_timeout: 25000, mt_pti: 0, mt_time: 10000
I (4219) wifi:AP’s beacon interval = 102400 us, DTIM period = 1
I (4229) wifi:<ba-add>idx:0 (ifx:0, 26:6a:1b:34:9b:82), tid:0, ssn:0, winSize:64
I (4779) Notification_t: Destroying: 0x3fce94f8, Text: ‘Scanning Wi-Fi’
I (4779) LcdDisplay: NotificationTimerCallback: Timer object 0x3fce13f8 deleted successfully.
I (4779) LcdDisplay: DisplayNotification: Creating Notification_t for ‘Scanning Wi-Fi’, duration: 2500 ms, icon: ‘Scanning’
I (4789) Notification_t: Creating: 0x3fce93b4, Initial Text: ‘Scanning Wi-Fi’
I (5219) wifi: Got IP: 192.168.2.207
I (5219) esp_netif_handlers: sta ip: 192.168.2.207, mask: 255.255.255.0, gw: 192.168.2.1
I (5219) Ota: Current version: 1.1.3
I (5219) Ota: board Json:


{
    "version":	2,
    "language":	"en-US",
    "flash_size":	16777216,
    "minimum_free_heap_size":	8279036,
    "mac_address":	"98:a3:16:c9:e4:4c",
    "uuid":	"ca444c6e-a69b-4e84-909f-de5f849b6724",
    "chip_model_name":	"esp32s3",
    "sn":	"XY006PL01USA0202775",
    "chip_info":	{
        "model":	9,
        "cores":	2,
        "revision":	2,
        "features":	18
    },
    "application":	{
        "name":	"xiaozhi",
        "version":	"1.1.3",
        "compile_time":	"Sep 15 2025T20:42:53Z",
        "idf_version":	"v5.3.3-dirty",
        "elf_sha256":	"ac436cad8f0e0e1ad920200416fed482dd3f0cd7ae0c91772dfb889814b40c25"
    },
    "partition_table":	[{
            "label":	"nvs",
            "type":	1,
            "subtype":	2,
            "address":	36864,
            "size":	16384
        }, {
            "label":	"otadata",
            "type":	1,
            "subtype":	0,
            "address":	53248,
            "size":	8192
        }, {
            "label":	"phy_init",
            "type":	1,
            "subtype":	1,
            "address":	61440,
            "size":	4096
        }, {
            "label":	"model",
            "type":	1,
            "subtype":	130,
            "address":	65536,
            "size":	983040
        }, {
            "label":	"ota_0",
            "type":	0,
            "subtype":	16,
            "address":	1048576,
            "size":	6291456
        }, {
            "label":	"ota_1",
            "type":	0,
            "subtype":	17,
            "address":	7340032,
            "size":	6291456
        }],
    "ota":	{
        "label":	"ota_1"
    },
    "board":	{
        "type":	"xuanzhi-yuanzhi-esp32s3",
        "name":	"xuanzhi-yuanzhi-esp32s3",
        "ssid":	"RJLs-iot",
        "rssi":	-34,
        "channel":	11,
        "ip":	"192.168.2.207",
        "mac":	"98:a3:16:c9:e4:4c"
    }
}

This JSON provides a wealth of information, including firmware version (1.1.3), flash size (16MB), MAC address, chip model (ESP32-S3 with 2 cores), application name (“xiaozhi”), compile time, and partition table details. The MQTT and WebSocket configurations also reveal the cloud communication endpoints.

I (5229) MQTT: decrypted password: – RJL BIGNUMBER

I (5349) EspHttp: Opening HTTP connection to https://xdc-ota.xorigin.ai/aipi/ota/
I (5369) MQTT: MQTT config – endpoint: 152.32.151.73, client_id: XY006PL01BIGNUMBER, username: XY006PL01BIGNUMBER  publish_topic: xorigin/device-server/XY006PL01BIGNUMBER, p2p_topic: forwards/p2p/XY006PL01BIGNUMBER/#
I (5379) wifi:<ba-add>idx:1 (ifx:0, 26:6a:1b:34:9b:82), tid:6, ssn:2, winSize:64
I (5399) MQTT: Connecting to endpoint 152.32.151.73
I (5659) PowerSaveTimer: SetEnabled: 1
I (5659) PowerSaveTimer: Power save timer enabled
I (5659) MQTT: Connected to endpoint
I (5659) AFE: AFE Version: (1MIC_V250121)
I (5669) AFE: Input PCM Config: total 1 channels(1 microphone, 0 playback), sample rate:16000
I (5679) esp-x509-crt-bundle: Certificate validated
I (5679) AFE: AFE Pipeline: [input] -> |NS(WebRTC)| -> |AGC(WebRTC)| -> |VAD(WebRTC)| -> [output]
I (5689) AudioProcessor: Audio communication task started, feed size: 160 fetch size: 512
I (5699) MODEL_LOADER: The storage free size is 21760 KB
I (5709) Application: STATE: idle
I (5709) PowerSaveTimer: SetEnabled: 0
I (5709) PowerSaveTimer: Power save timer disabled
I (5719) YuanZhiESP32S3: ======= 开始状态仲裁 =======
I (5729) YuanZhiESP32S3: 输入 – 电源状态: 9, 设备状态: 3
I (5729) YuanZhiESP32S3: 全局最高优先级状态: DeviceState, 值: 3, 优先级: 6 (数字越小优先级越高)
I (5739) MODEL_LOADER: The partition size is 960 KB
I (5749) MODEL_LOADER: Successfully load srmodels
I (5749) WakeWordDetect: Model 0: wn9_computer_tts
I (5759) AFE_CONFIG: Set WakeNet Model: wn9_computer_tts
MC Quantized wakenet9: wakenet9l_tts1h8_Computer_3_0.648_0.650, tigger:v3, mode:0, p:0, (Feb 18 2025 12:00:54)
I (5809) AFE: AFE Version: (1MIC_V250121)
I (5809) AFE: Input PCM Config: total 1 channels(1 microphone, 0 playback), sample rate:16000
I (5819) AFE: AFE Pipeline: [input] -> |VAD(WebRTC)| -> |WakeNet(wn9_computer_tts,)| -> [output]
I (5829) WakeWordDetect: Audio detection task started, feed size: 512 fetch size: 512
I (5839) main_task: Returned from app_main()
I (6589) Ota: board Json:


{
    "firmware":	{
        "version":	"1.1.3",
        "url":	""
    },
    "mqtt":	{
        "endpoint":	"152.32.151.73",
        "port":	"1883",
        "username":	"<meta charset='utf-8'>XY006PL01BIGNUMBER",
        "password":	"dfbf5fd174d8b97ba64b5caf0d5c47d47bc395a98e8d47825bdd86b6e81efef3",
        "client_id":	"<meta charset='utf-8'>XY006PL01BIGNUMBER",
        "publish_topic":	"xorigin/device-server/<meta charset='utf-8'>XY006PL01BIGNUMBER",
        "subscribe_topic":	"xorigin/devices/<meta charset='utf-8'>XY006PL01BIGNUMBER",
        "p2p_topic":	"forwards/p2p/<meta charset='utf-8'>XY006PL01BIGNUMBER/#"
    },
    "websocket":	{
        "url":	"ws://xdc-chat.xorigin.ai:8000/xiaozhi/v1/",
        "token":	"kaf7vNyM7beGyCoGyqa8VehFoUEXnsfuAS56Kt1lnU"
    },
    "server_time":	{
        "timestamp":	1759809947350,
        "timeZone":	"America/New_York",
        "timeZoneOffset":	0
    },
    "snStatus":	{
        "sn":	"OK"
    }
}


W (6659) Ota: Failed to get port object
I (6659) Ota: Current is the latest version
I (6659) Ota: Running partition: ota_1
I (6669) Application: Resampling audio from 16000 to 24000
I (6669) OpusResampler: Resampler configured with input sample rate 16000 and output sample rate 24000
I (7299) Notification_t: Destroying: 0x3fce93b4, Text: ‘Scanning Wi-Fi’
I (7299) LcdDisplay: NotificationTimerCallback: Timer object 0x3fcd8b04 deleted successfully.
I (7309) LcdDisplay: DisplayNotification: Creating Notification_t for ‘Network connection successful’, duration: 800 ms, icon: ‘Connected’
I (7319) Notification_t: Creating: 0x3fce88d4, Initial Text: ‘Network connection successful’
I (8129) Notification_t: Destroying: 0x3fce88d4, Text: ‘Network connection successful’
I (8129) LcdDisplay: NotificationTimerCallback: Timer object 0x3fcd45ac deleted successfully.
I (15839) Application: Free internal: 29975 minimal internal: 17611
I (18189) I2S_IF: Pending out channel for in channel running
I (18189) AudioCodec: Set output enable to false
I (25839) Application: Free internal: 30979 minimal internal: 17611
I (35839) Application: Free internal: 29951 minimal internal: 17611

That’s a lot of words, but we’re really just looking to harvest hardware data from it now. What have we learned?

Key Discoveries

GPIO
5, 4, 7, 18, These are configured in a clump. The lines following this are Display this, LcdDisplay that, and LVGL the other. That’s a good hint. 5 and 4 are both in and out. 7 and 18 are output only. It’s PROBABLY SPI – most LCDs are. For such a small display, MISO is probably ignored and CS is probably tied. So we need SCK (clock), MOSI (Master out, slave in), D/C (Data/Command), and maybe Reset. Maybe. All these are configured as outputs, but 4, and 5 can be either. Brightness comes later, but not with debugging we can identify, but let’s leave 5, 4, 17, and 18 as LCD candidates.
21 “CHRG pulse counter initialized on GPIO 21”. There is a pulse counter on the ESP32. i haven’t used it, but know it’s there. It’s mentioned in the middle of ES8311 initialization, which doesn’t make sense. Since this chip usually takes I2C for commands and I2S for data, which requires more pins than that.  But we know pin 21 is an input to the esp32. It’s Digital ONLY (as pulses would be)
9 We can see it’s an ouput and likely involves ES8311, but we don’t have much info yet
46 is connected to the onboard WS2812 near that left button. Thank you, Jack Wilson!

Pin Description COmments
GPIO1 Batter Sensor  
GPIO2 ES8211 Attenuation  
GPIO3 Backlight LED Cell 3
GPIO4 I2C SCL
GPIO5 I2C SDS
GPIO6 I2S Master Clock
GPIO7 Display Data/Command
GPIO8 ?  
GPIO9 Speaker Enable Eliminate power on pop for amp
GPIO10 ? always high
GPIO11 I2S Data OUT -> ES8311
GPIO12 i2S LR CLock (Word Select)
GPIO13 I2S Data IN
GPIO14 I2S BCLK
GPIO15 SPI: Display Chip Select
GPIO16 SPI: Display Clock
GPIO17 SPI: Display MOSI Master Out, Slave In (a.k.a. PICO Peripheral  In, Controller Out 
GPIO18 SPI: Display Reset
GPIO19 USB D-
GPIO20 USB D+
GPIO21 ES8311 Charge Pulse counter ??
GPIO26, GPIO27, GPIO28, GPIO29, GPIO30, GPIO31, GPIO32 Reserved by ESP32-S3 in-package flash/PSRAM 
GPIO33, GPIO34, GPIO35, GPIO36, GPIO37  Reserved by ESP32-S3 Used in Octal PSRAM
   
GPIO40 External Expansion  
GPIO41 External Expansion  
GPIO42 Button, Right  
GPIO45 Reserved by ESP32-S3 strapping pin for VDD_SPI voltage
GPIO46 WS2812  (near left button) (also, on input, straps suppress printing)
     
At this point, we have a pretty darned decend understanding of the electronics of this thing.    
LIBRARIES
The device utilizes LVGL for its display interface and Opus for audio compression, converting analog mic input (via ES8311’s ADC) to I2S for the ESP32 before internet transmission.

CHIPS
We learned there’s an ES8311 “Low power mono audio CODEC”. 

BUTTONS
If the designers read the Espressif design guidelines, the buttons would correspone to GPIO0 and CHIP_EN, but they don’t seem to act like those pins. Investigate more.

Mysteries
* The chip itself told us that it has “Embedded PSRAM 8MB”. It’s odd the chip doesn’t announce PSRAM as found. At runtime, it crows “17611” which isn’t a lot if you started out with 8*1024*1024, but maybe they have the system highly tuned and have everything preallocated from the beginning.
* “application”: “name”: “xiaozhi”, is likely a very strong hint.
* TOOD: XY006PL01BIGNUMBER is almost certainly a device S/N that was edited out

Next Steps
Disassembly, reassembly instructions, 50 high-resolution PCB images, and a deeper dive into the software ecosystem are planned.

This blog has always leaned heavily into RISC-V, but this year has been a bit of a low in RISC-V for me. That’s probably worth an article of its own, but since I was just asked what I’ve been using lately, I have to admit my time has been spent on a family that’s not RISC-V: ESP32.

“But wait, there are ESP32 RISC-V parts!”

Yes. And ESP-IDF is pretty awesome to work with, but so far Espressif hasn’t announced a dual-core RISC-V part with radios and they haven’t shipped their dual-core part without radios. I don’t have high expectations for ESP32-P4 (see also: 2023’s low-lites for this class of parts)  but I’m loving the part they announced at the same time they announced their first part, the ESP32-C3 – the (Tensillica, not RISC-V) ESP32-S3. Since I was recently asked what I was using for my own hobbyist projects his year and why, let me catpure that here:

I’m really liking that ESP32-S3-N16R8 lately.

  • They’re dirt cheap at around $5USD at Aliexpress.
  • 16MB Flash. 8MB RAM. is “enough” for everything I do. I don’t buy specialized boards; I stock a bunch of these.
  • one USB-C cable gives me power, debug, serial console AND JTAG.
  • A second USB-C cable gives the latter two that don’t reset when the CPU is reset. :-/
  • Lots of GPIOs, but rules can be dumb. More in a moment.
  • Fastest device that Espressif makes. Yas, P4 will ship someday…but have no wifi.
  • Floating point AND a vector unit that’s usable in AI or compute-heavy things like speech recognition. More compute in AES and other dedicated blocks.
  • Unlike previous ESP32s, PSRAM is fast and actually works well.
  • Specialized peripherals that are useful for things other than intended purposes. Using solder pads as buttons is cool. (OK, that’s actually intended…) but RMT to program LCDs is pretty cool.
  • Dedicated GPIO lets you program weird devices FAST in almost single opcode timings. Almost. Far from many hundreds of clock cycles per write while arbiters swing across busses like in previous.
  • USB peripheral (don’t spend on CH340 or mess with jumper posts and cables) on board so flash can be a “disk drive” or device can be a mouse or a keyboard or a MIDI controller or whatever yout want it to be. (It’s USB 1.1, so it’s not a FAST disk drive, but it’s a convenient one.)
  • USB host – you can plug a keyboard or a mouse or a midi into IT.
  • A ton of GPIO (45), though a bunch of them are taken for USB, PSRAM, bootstrapping, etc. It can be hard to figure out what’s safe. [Atomic14](https://github.com/atomic14/esp32-s3-pinouts) is helping with that. There is a big ole pin multiplexor that lets you reassign a bunch of pins to a bunch of other pins, but not quite randomly.
  • Cheap!

I think ESP32-S3-N16R8 is similar to parts like www.vcc-gnd.com’s YD or Espressif’s own, but it’s cheap.

Downsides? There seem to be only a few road hazards that trip people up.

  •  “Safe” pins are hard to figure out. Really. See above.
  • Onboard WS2812B isn’t actualy hooked to GPIO48 (letting you use it…) until you solder blob that tiny “RGB” pad.
  • 5V isn’t provided to USB-C peripherals (“OTG” mode) until you put a solder blob on the other side of the board to connect the VCC rails of the USB sockets.
  • Confusion between ESP32-S3’s own USB/Serial bridge on the USB-C connector on the left and the one on the right that goes to the USB serial bridge from WCH … that definitely requires a shady looking driver for reliable communications on MacOS.

Why are these boards so interesting?

  • There have been a bunch of C906 boards this year, but none have radios and none at this price point.
  • There have been a few JH-7110 boards this year. They’re far from $5 and simply aimed at a totally different market than these.

If Espressif offered a RISC-V part with the S3 feature and peripheral set, that would be awesome, but that’s just not a point in the price/performance/feature curves that anyone has tried to hit so far. I’d love to see it, though. 

Should we talk more about any of the above?

What are YOU building with? For this discusion, I’m asking about $5 WITH WIFI kinds of products, so not a NAS or an edge firewall or something, but rather holiday lights or an internet radio. What’s your IoT GOTO device right now?