This is an article I’m updating as I experience this device.
June 17. First update.
June 18, Hello World added.
Aug 16, 60 GPIOs. None free!
I was lucky enough to score one of the first Espressif S31-Korvo development boards. The board itself is a bit nifty as far as SBCs go, but let’s be honest, this is a development vehicle for their new darling of the development the ESP32-S31. It’s available from Espressif’s store on Aliexpress. (Brace yourself: shipping commands a premium, but I had five-day delivery to the U.S. once it shipped.) As an explorer, I won’t repeat the data sheet here, but I’ll focus on surprising things I learn along the way.
Espressif’s Naming
As with their entire lineup, it’s designed to confuse people. Here’s my take on it.
The chip is ESP32-S31 . That’s the 8 mm square part that most peole will never actually see. When we talk about “ESP32-S31”, we’re mostly talking about the chip that’s inside the chip that’s inside the module that’s on a board. Whew! Matryoshka dolls all the way down
Most users will never really see the ESP32-S31. If you peek inside the module, you’ll find the actual core is packaged on the wafer next to a few passives and flash ROM in the upper left corner here. The PSRAM is stacked directly atop the main SOC silicon, harder to see in this picture from 3DPhotonix. (This is an ESP32-S3, but most modern modules follow this basic model.)
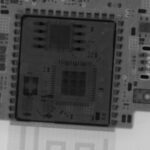
What most people will commonly call the “ESP32-S31” is the module. The module (usually) includes an antenna or antenna connector, the flash, and a handful of passives to stabilize the whole thing. That’s the familiar postage-stamp-sized thing with all the pins we see:
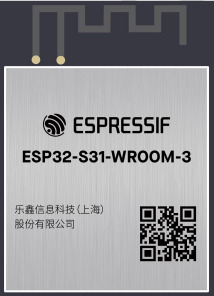
Espressif’s product line breaks down approximately like
- ESP32-H: (Examples: ESP32-H2, ESP32-H4) Low-power. Targets IoT with funky radios
- ESP32-C: (Ex ESP32-C2, ESP32-C3) – more performance, high-volume, single-core, simple connectivity
- ESP32-S (Ex.: ESP32-S2, ESP32-S3, ESP32-S31: high performance, rich networking connectivity,
- ESP32-P (Currently ESP32-P4): High performance, high connectivity for video (camera, screen) applications.
Notice how this categorization doesn’t really say what CPU core is used. Older parts are Xtensa; newer parts are RISC-V. Some people will scream that the ESP32-S31 shouldn’t cluster with ESP32-S3 because it’s RISC-V instead of XTensa. It’s probably borderline to say that it coudlhave been ESP32-S4 to help searchability, but I don’t pick the names.
ESP32-S31: Defined and Product Positioning
In product positioning, the ESP-S31 seems aimed to generationally replace the original ESP32 and the ESP32-S3, which featured higher performance, but notably misses a few key peripherals like legacy Bluetooth (adoption of audio BLE hasn’t really happened) and turns the knob to eleven for performance.
It’s positioned a bit below the ESP32-P4 for performance, targeting “a maximum of 320 MHz,” while the ESP32-P4 promised 400Mhz. (To my great annoyance, they shipped a ton of what was essentially engineering samples that didn’t meet the published specs. They were 360 MHz parts, but they only changed the datasheets to reflect this after they’d shipped for about two years.) It doesn’t feature the MIPI interface, but it adds Gigabit Ethernet and, critically to a lot of people, a full collection of radios.
The reality of choosing chips in commercial products is that every gate and every pin for a feature you don’t need is cost wasted, so the ideal SOC has everything you need and nothing else. For most hobbyists or low-quantity development, it’s usually the case to standardize around a chip a little more featureful than you need, but at a budget that you don’t weep about. For example, I use ESP32-S3 in most of my projects, whether I need CANBus, err, TWAI, or not just because standardizing around a single toolchain is easier than trying to save a coin or two on a less featured part. Could I use some less expensive WCH32V part instead of an ESP32-C3 when I don’t need WiFi? Sure. But when ESP32-C3 Nanos are two bucks (often $1 on sale as a filler item), it’s easier to just keep them on hand as my goto low-end device. When I need a bit more chops, I waffle between the ESP32-S3 Supermini when size counts or an ESP32-S3 N8R16 DevKit-C clone when I need more pins or more RAM. I don’t stock the N4R2 variations that are $0.35 cheaper…because I’m a baller like that.
ESP32-S3 seemed logical to replace the original 2016 ESP32, but several omissions made that impractical. Notably, it brings back Classic Bluetooth, making it usable for audio Bluetooth. The original ESP32 had two DAC channels on GPIO25 and GPIO26. ESP32-S3 lacked DAC support completely. ESP32-S31 gives us two 10-bit and two 12-bit DACs. ESP32-S3 also surrendered SDIO slave mode and the Ethernet MAC. This meant that ESP32-S3 wasn’t just a slam-dunk replacement for the older part. ESP32-S31 “fixes” those omissions and adds many new internal peripherals.
ESP32-S31 adds (back) all of those. It raises the gigabit Ethernet option to a 1 Gbps interface. It adds WiFi 6 (probably borrowing from the ESP32-C6), which gives the reliability of 802.11AX for better handling in crowded WiFi environments. We go from 45 to 60 GPIOs, though in reality that number will never actually be available to everyone. We gain two more UARTs, raising the number to five. We gain three SPI controllers, reaching seven. We gain an I2C controller, giving us three. We get another LED PWM controller, giving us two. ESP32-S3 supported a maximum of 32MB of PSRAM, though only 2, 8, and 16MB were common. ESP32-S31 raises maximum addressable flash and PSRAM to 256MB and64 MB, respectively.
We also see peripherals that we’ve seen in newer models ESP32-C6 or ESP32-P4 added, like the advanced JPEG and 2D-DMA hardware acceleration for video, and a second generation touch sensor.
- PARLIO is for high-speed, parallel data streaming. It is highly optimized for routing parallel camera inputs or high-resolution displays.
- BitScrambler is a new alternative to RMT and is reminiscent of the PIO engines in Raspberry Pi Pico. It’s a hardware programmable state machine located within the DMA path. to arbitrarily reorder, mask, or shift incoming/outgoing bits on the fly during data transfers, making it highly useful for direct generation of protocols (like WS2812 LEDs) or out-of-order data alignment without loading the CPU.
- A hardware JPEG codec offloads CPU for rapid encoding and decoding.
- The Pixel Processing Acelerator, PPA, is a dedicated 2D graphics accelerator used for image scaling, color space conversion, and basic 2D operations, significantly boosting GUI and HMI performance.
- ASRC adds Hardware-level audio processing block designed to adjust digital audio sampling rates on the fly.
- The new radios get all the IoT buzzwords: WiFi 6, Thread and Zigbee
It’s like Espressif looked around their module collection that they already had IP for and turned on all the #ifdfefs. Kitchen sink included!
Presumably they learned a lesson from the P4 fiasco and are more forthcoming that this is currently an engineering sample part and they’re strongly branding it as such. To their credit, they’re providing very complete developer kits, a hundred-page datasheet and extensive technical reference manual.
Now as I write this, these are new. Very very new. They’re for developers to bring up their own products and evaluate for their own designs. There are rough spots.
- ESP-IDF for ESP32-S31 is under active development. There was some support in 5.5, but yu probably want to follow master. (Observe that just changing the doc tage to ‘latest’ makes the page disappear.) It will probably be ESP-IDF 6.1 where S31 lands “for realsies”. I’d expect common operations (wiggling GPIO pins, std::cout, etc.) to land before every detail of every periphal described above is fully accessible.
- The Espressif Forum has a section dedicated to ESp32-S31.
- ESP-Arduino32 Is simply not ready. It’ll be Arduino4 and the patches being proposed so far make it clear that we’re in for another “dot oh” rough transition, as we incurred during the 3.0 transition a few years ago, though it looks less radical. They’ll need to land IDF 6.1 and then roll in new ESP32-S31 support for Arduino.
ESP32-S31: Need for Speed.
It’s designed to be fast. (Ahem. See later note on the difference between design and implementation…) Clock speed doesn’t tell the whole story. (Never has…Remember when a 60Mhz Pentium would beat up your 66Mhz 486 and take its lunch money? Well, it’s 1989 all over again.)
| Architecture | ESP32-S3 | ESP32-S31 | ESP32-S4 |
|---|---|---|---|
| Max Clock Frequency | 240 | 320 | 400 |
| CoreMark/Mhz | 5.54 | 6.86 | 6.228 |
|
Total CoreMark/td> |
1329.92 | 2195.20 | 2491.20 |
CoreMark is an industry standard measure of performance in microcontrollers. Think of it as a modernized Dhrystone, but complicated enough that optimizers don’t recognize it and special-case the source code. The number in this table is “6.86”. It’s faster per clock cycle than the flagship ESP32-P4 (we assume it benefits from another three years of tuning) and it’s way faster per clock cycle than the Xtensa LX7 core in an S3 (which was alrealdy faster than the LX6 in original ESP32.) So we could expect a 240 MHz ESP32-S31 (no such configuration exists as of this writing) to be about 23.8% faster on compute-bound tasks than the familiar ESP32-S3, just by nature of rebuilding your source for it.
Development Boards
In this pre-launch state, there are two boards available from Espressif. The launch boards exist to help developers build their actual products. It lets us test code generation, built tooling, prototype with breadboards or connected breadbords, and generally decouple our own hardware and software development from the needs of the SoC.
ESP32-S31-Function-CoreBoard (I don’t know why “function” is in that name, but it is…) is the kind of obvious entrypoint. It’s inexpensive for even a hobbyst at about $25UD. This isn’t the board I have, so this isn’t discussed further.
ESP32-S31-Korvo-1 (I also don’t know if the “-1” is part of the name, but it is…) is a fully-featured board with electronics approximately similar to that of an Amazon Echo type of product.
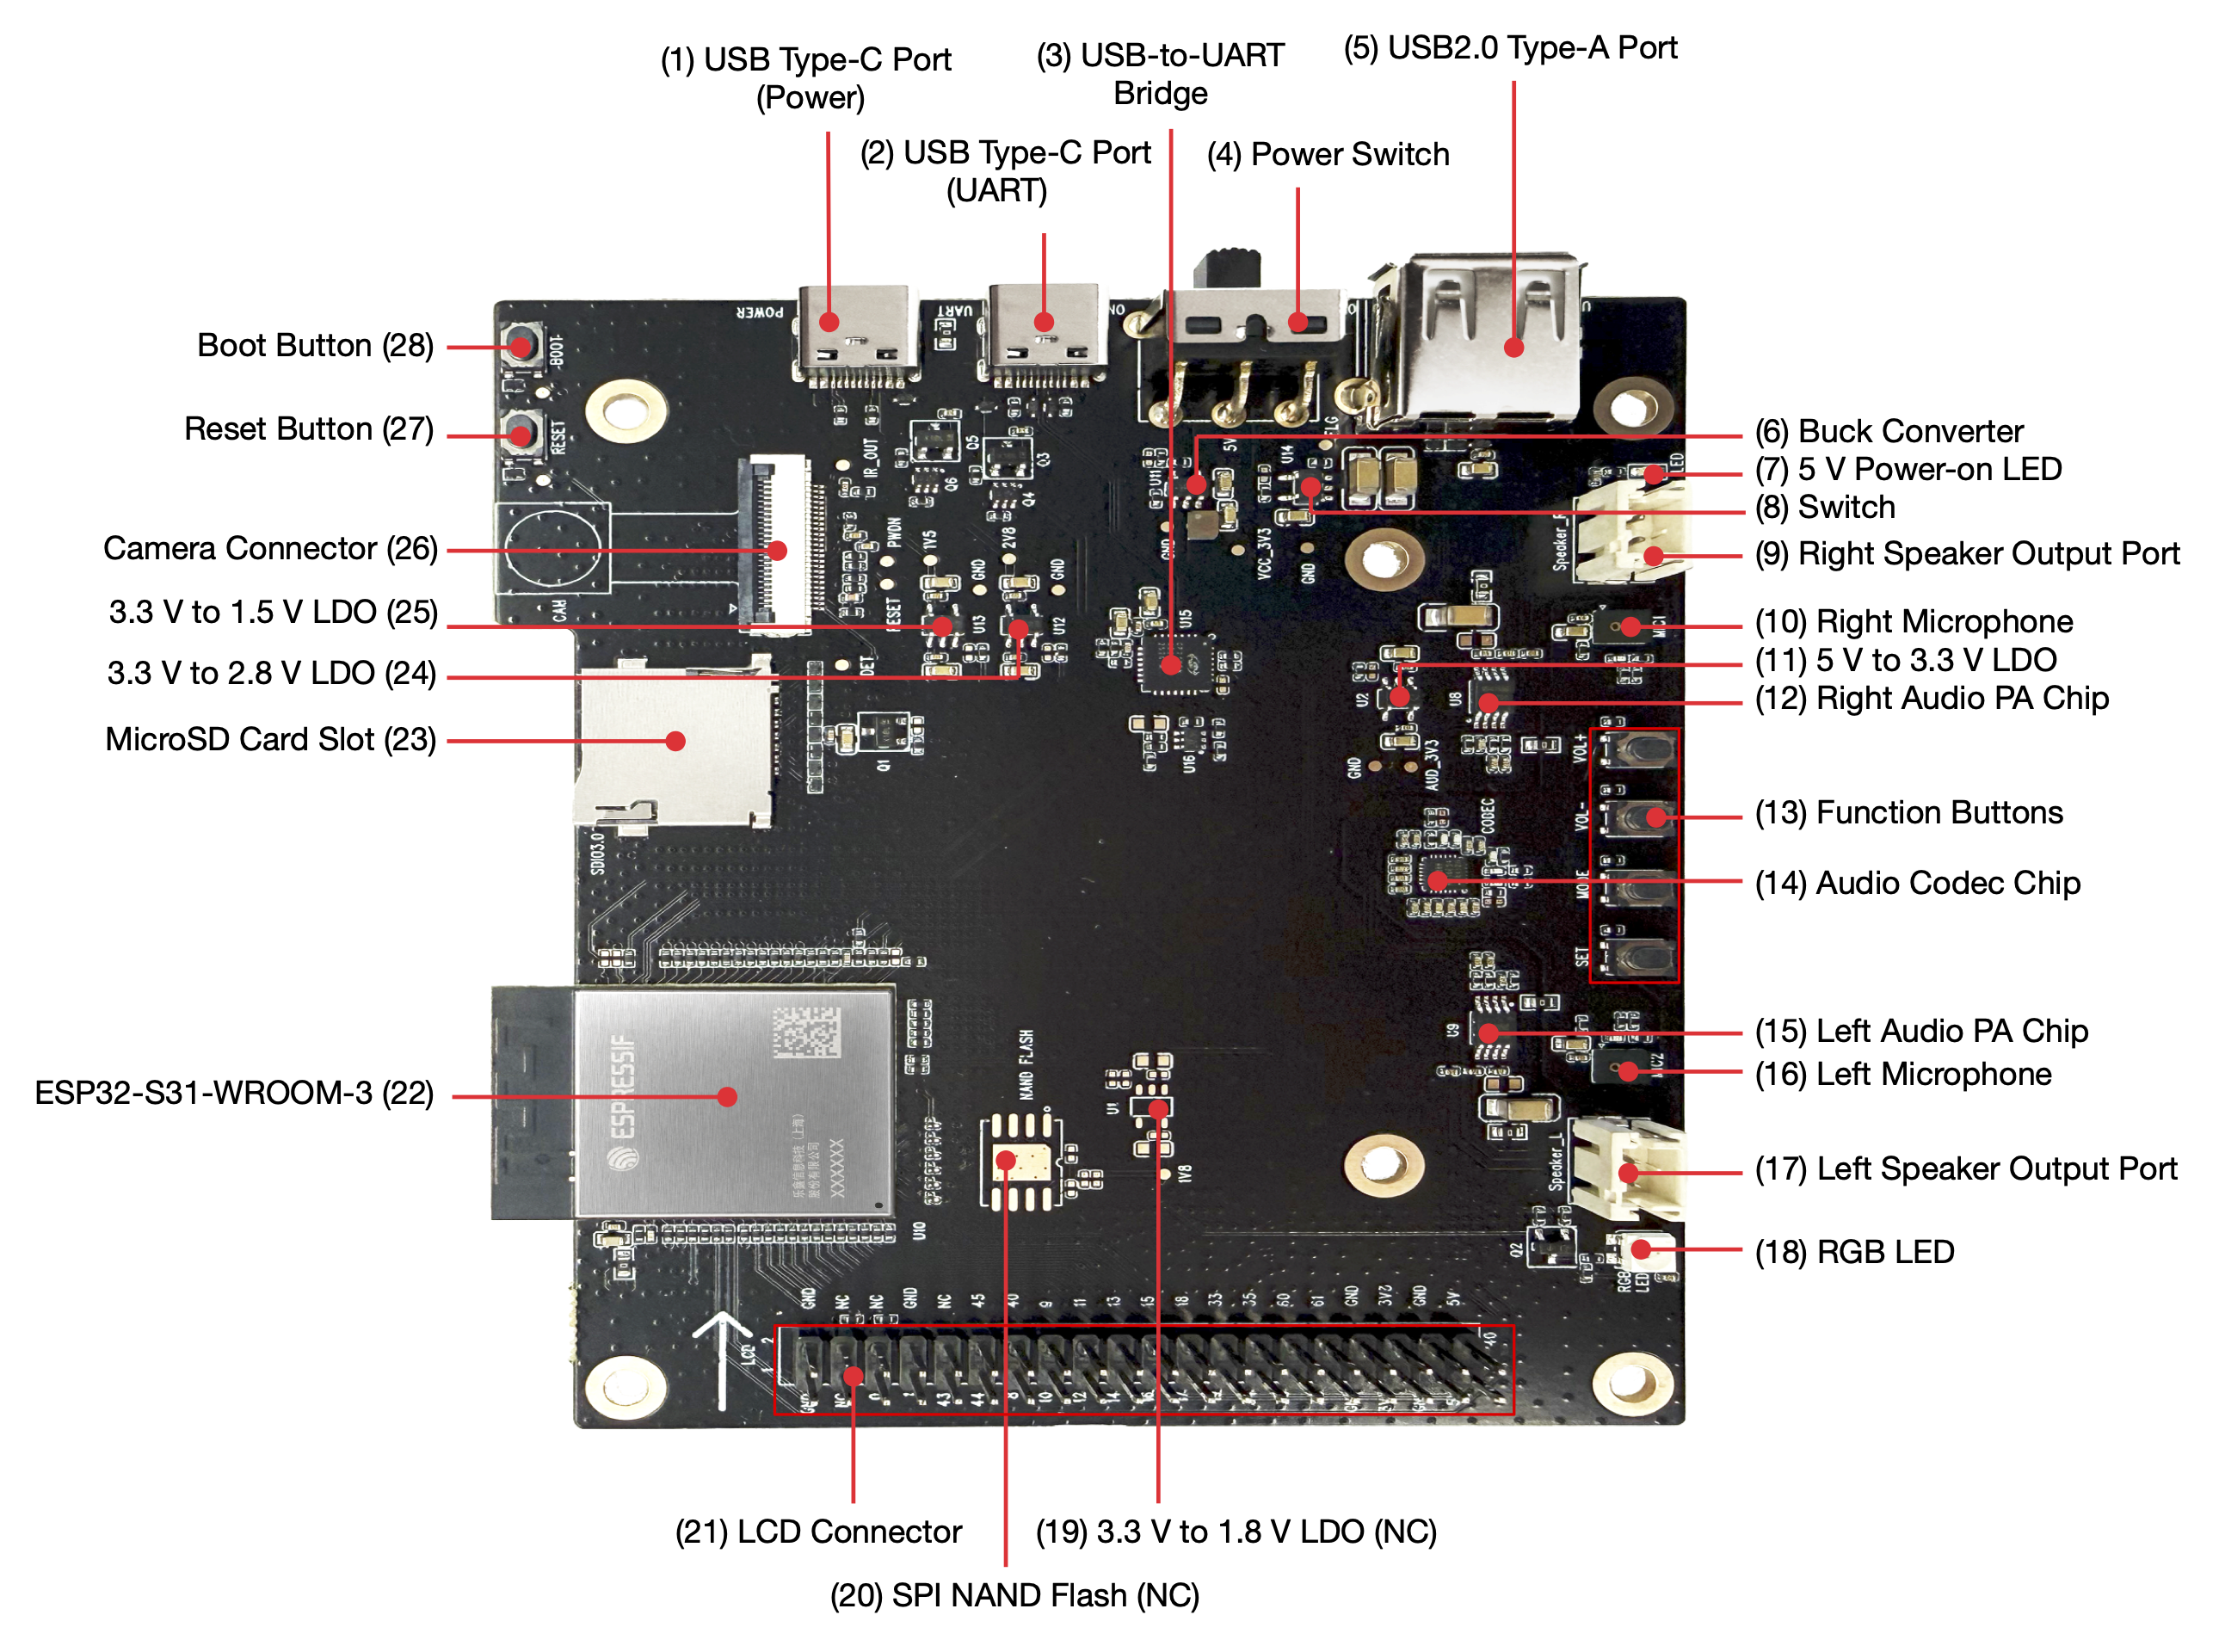
Hands-on with the board
One aspect of this board that’s impressive on its own is that while the ESP32-S31 has the most GPIO pins of any Espressif component to date, all sixty of them are connected and put to use on this board. If you’re expecting to be able to breadboard with it, be prepared to give up the satellite board that homes the camera and screen as they’re using the majority of the the available pins. The RGB LCD alone gets 23 pins; the DVP camera another 13.
The board seems well designed. Schematics are provided. In development board traditoin, this is implicit permission to borrow liberally from their design. After all, a board developed by the makers of the chip surely get the details right, right? (Perhaps there’s explicit permission. I didn’t dig deeply.)
I particularly like the note:
The microSD card and SPI NAND flash functions share GPIO20–GPIO25 on the ESP32-S31-WROOM-3 module. The board uses the microSD card function by default. To switch to the SPI NAND flash function, perform hardware rework: remove R7, R65, R66, R67, R68, and R69, and populate R22, R23, R1, R2, R3, R4, C6, R20, and U4.
You want to use SPI NAND? There are pads on the board for you to install it. “Knock yourselves out, dudes!” 🙂
Having recently battled the M5Stack Tab5 that reused the same SPI bus for internal flash and the display, guaranteeing that the DMA can’t refresh the screen and do any file access at the same time, I appreciate that it seems everything is on a separate bus.
I also like that schematics for Korvo-1 are provided.
They’ve moved past their two-transistor design for DTR/RTS pins to wiggle the handshake… to an integrated BC847BDW1T1G to handle that duty.
Hands-on: USB pain
Both USB connectors hav e5.1k pulldowns on CC1 and CC2, ensuring the board will actually power up a complant USB-C Downward Facing Power device and signals a simple request for up to 3A from the host. It’s sad that this has to be called out for a gold star 14 years after USB-C was introduced, but here we are.
Also sad in 2026, doubly so for a chip that is Espressif’s second to contain a high speed (that’s USB-speak for 480Mbps connection… from 2001) is that the USB-C connection is wired ONLY to a stupid Silicon Labs CP2102N:
$ lsusb

[ ... ]

Bus 003 Device 004: ID 10c4:ea60 Silicon Laboratories, Inc. CP2102N USB to UART Bridge Controller Serial:

[ ... ]
This is a terrible experience. USB/Serial is probably the least nimble (well, maybe HID beats it…) USB protocol for efficiency, but this means you’re still using USB 1.1-era speeds, can’t use the USB-C connector for … USB-C things like connecting keyboards, mice, network adapters, storage, etc. to the device itself and, worst of all, it simply works badly. My first task was to back up the image in the factory flash. Espressif users know this drill. Since the data sheet says “Single-chip USB-to-UART bridge supporting up to 3 Mbps.”, we’ll start there.
$ esptool --baud 3000000 -p /dev/cu.usbserial-3110 read-flash 0 0x1000000 factory_image.bin
esptool v5.3.0
Connected to ESP32-S31 on /dev/cu.usbserial-3110:
Chip type: ESP32-S31 (revision v0.0)
[ ... ]
Reading from 0x001db000 [==> ] 11.6% 1945600/16777216 bytes...
Reading from 0x001dc000 [==> ] 11.6% 1949696/16777216 bytes...
Reading from 0x002e8000 [====> ] 18.2% 3047424/16777216 bytes...
Hard resetting via RTS pin...
A fatal error occurred: Serial data stream stopped: Possible serial noise or corruption.
Well, we know that USB is an error-detecting, error-correcting protocol, so we can either credit the UART just being crappy or there being a bit error introduced on the 4cm separating the CP2102 and the ESP32-S31. (Narrator voice: smart money is on the former…) Well, clearly we’re the victim of alpha particles. Let’s just bang on repeat:
$ esptool --baud 3000000 -p /dev/cu.usbserial-3110 read-flash 0 0x1000000 factory_image2.bin
esptool v5.3.0
Connected to ESP32-S31 on /dev/cu.usbserial-3110:
Chip type: ESP32-S31 (revision v0.0)
Configuring flash size...

Reading from 0x00623000 [==========> ] 38.4% 6434816/16777216 bytes...

Hard resetting via RTS pin...

A fatal error occurred: Invalid head of packet (0xFF): Possible serial noise or corruption.
Well, hell. Let’s go down 30% from the published spec.
$ esptool --baud 2000000 -p /dev/cu.usbserial-3110 read-flash 0 0x1000000 factory_image2.bin
[ ... ]
Reading from 0x000a2000 [> ] 4.0% 663552/16777216 bytes...
Hard resetting via RTS pin...
A fatal error occurred: Invalid head of packet (0xE1): Possible serial noise or corruption.
Surely it’s reliable at 1/3 the published speed:
$ esptool --baud 1000000 -p /dev/cu.usbserial-3110 read-flash 0 0x1000000 factory_image2.bin

[ ... ]

Reading from 0x00144000 [=> ] 7.9% 1327104/16777216 bytes...Hard resetting via RTS pin...

A fatal error occurred: Invalid head of packet (0x1B): Possible serial noise or corruption.
OK, let’s halve that again!
$ esptool --baud 460800 -p /dev/cu.usbserial-3110 read-flash 0 0x1000000 factory_image2.bin
A fatal error occurred: Invalid head of packet (0xBF): Possible serial noise or corruption.
This isn’t funny. Let’s go down to speeds I was using for ASCII terminals in the 90’s
$ time esptool --baud 115200 -p /dev/cu.usbserial-3110 read-flash 0 0x1000000 factory_image2.binConfiguring flash size…
Read 16777216 bytes from 0x00000000 in 1516.1 seconds (88.5 kbit/s) to ‘factory_image2.bin’.Hard resetting via RTS pin…
esptool –baud 115200 -p /dev/cu.usbserial-3110 read-flash 0 0x1000000 60.63s user 24.04s system 5% cpu 25:18.17 total
So, in 2026, it can’t even saturate a 1990’s transfer speed…and managed to take 24CPU seconds on a 4.5Ghz CPU…to move the back-breaking mass of 16MB. (Not GB. MB…As perspective, Wikipedia shows the second USB flash drive ever was 16MB.) Of course, since it’s proven it’s untrustable, I then have to repeat it to be sure the resulting .bin actually transferred without error. That attempt took about as long.
But will it blend JTAG?
One of my absolute favorite features of Espressif products that’s a key feature is that the chip’s own USB controller actually implements two endpoints. The second one is the best known. It’s a CDC-ACM endpoint that, if you turn it on with KCONFIG(ESP-IDF) or -DARDUINO_USB_MODE and -DARDUINO_USB_CDC_ON_BOOT (Arduino) that the console gets plumbed to your USB controller. So without needing a pair of transistors or the cost of an external bridge, your device shows up as an emulated serial port to the host and console std::print and std::cout and std::cin (or printf if that’s how you roll) shows up. It’s very nifty. The lesser known endpoint zero provides a JTAG interface. You just run openocd -f board/esp32s3-builtin.cfg, start gdb, target remote:3333,(OK, and a bit of yadda yadda that's easy to automate) and you get full glorious JTAG so you can watchpoints, single step through code, including tricky code like boot or interrupt handlers and go. For most of us, that means you can get power, console, and debugging all with a single commodity cable. It gives you a great way to upload code or download collected samples or profiling data if you have slow or unreliable serial (ahem).
The good news is that Espresssif does provide this in the ESP32-S31. The (expected) chapter on Debugging ESP32-S31 with OpenOCD (via USB) is present.
(from the setup, you know what’s coming next…)
The bad news is that this requires GPIO34 and GPIO35 (USB1P1_DP and USB1P1_DN) to be connected to the respective pins of the USB connector. They’re not. Those pins are plumbed to LCD_R5 and LCD_R6. No USB JTAG debugging for you.
But you can use the 4-pin classic MTDO/MTDI/MTCK/MTMS style with an ESP-PROG or other JTAG probe, right? Let’s see, those are GPIO54, 56, 55, and 57. I think I’ve sufficiently foreshadowed how this story ends. Those are DVP_PCLK and DVP_Y9-Y7. “Well, at least those are on the .100 posts and if you’re not using the LCD you can just DuPont those wires into place.” No. That’s the FPC 24-pin connector for the camera. There are surely people with the right tools and skills to tap into that camera connector and use them, but I’m not one of them.
USB – conclusion
The ‘high speed’ (USB 2.0) controller is actually plumbed to an USB-A connector of all things. So you can presumaby develop code to use TinyUSB to attach peripherals using the connector from the 1990’s, but you cannot attach a USB-C host device, like a computer, and use the board to present, say,>UVC (USB Video Class) to a host.. To a host computer, that USB-C connection as as archaic as dangling an external dongle and attaching duponts to TX, RX, and GND to a device from last century. It’s a pretty inexplicable implementation choice.
Let’s Build Code: ‘hello world’
Remember, this module is so new that it’s not even recognized in ESP-IDF 6.0.1, the current version as of this writing. It’s also completely unrecognized by chat.espressif.com so you have to find information via earch and a bit of fiddling with the version numbers in the URL in the deployed doc or the version spinner in the upper left corner of most pages on documnra
idf.py set-target esp32s31
Error: Invalid value for '{esp32|esp32s2|esp32c3|esp32s3|esp32c2|esp32c6|esp32h2|esp32p4|esp32c5|esp32c61|linux|esp32h21|esp32h4}': 'esp32s31' is not one of 'esp32', 'esp32s2', 'esp32c3', 'esp32s3', 'esp32c2', 'esp32c6', 'esp32h2', 'esp32p4', 'esp32c5', 'esp32c61', 'linux', 'esp32h21', 'esp32h4'.
Well, it was polite to be conclusive that ESP32-S31 was not something it trafficed in and to list the options. Fortunately, we know this is ‘just’ a RISC-V core (or three…) and RISC-V code emitters have been around for a long time, so we don’t have to fret about bringing up a new architecture. We also know that Espressif might not have released this yet, but have done extensive testing – enough to validate that spiffy preloaded coffee making app (bug report: did not receive espresso…) so it’s time to head for master. We’re off to see the (EIM) wizard…
$ eim wizard
[ ... ]
? Please select all of the target platforms (ESP chips) ›
✔ all
⬚ esp32
⬚ esp32c2
⬚ esp32c3
⬚ esp32c5
⬚ esp32c6
⬚ esp32c61
⬚ esp32h2
⬚ esp32p4
⬚ esp32s2
⬚ esp32s3
⬚ esp32s31
Well, good. This definitely knows about ESP32-S31. Let’s choose a reasonable installation of master.
[ ... ]
You have successfully installed ESP-IDF
for using the ESP-IDF tools inside the terminal, you will find activation scripts inside the base install folder

sourcing the activation script will setup environment in the current terminal session

============================================

to activate the environment, run the following command in your terminal:

source "~/.espressif/tools/activate_idf_master.sh"

============================================

2026-06-19 01:54:33 - 1 - 06 - INFO - Wizard result: %{r}

2026-06-19 01:54:33 - 1 - 06 - INFO - Successfully installed IDF

2026-06-19 01:54:33 - 1 - 06 - INFO - Now you can start using IDF tools
So let’s do that:
source "~/.espressif/tools/activate_idf_master.sh"
Added environment variable ESP_IDF_VERSION = 6.2.0
[ ... ]
Environment setup complete for the current shell session.These changes will be lost when you close this terminal.You are now using IDF version 6.2.0.eim select master
That’s interesting. I expected 6.1.0, but we scored 6.2.0. Whatever. Let’s roll with it.
I dug around in doc to find what wa supported and found there’s an official ESP31-S31 Status in ESP-IDF page that sets expectations of what will and won’t work. As I write this, the page was updated just a few hours ago, so welcome to the edge! Skimming the list, I’ve definitely used “production” parts with a lower percentage of tasks completed. I appreciate their honesty. It’s helpful to know that, say, floating point and Bitscrambler are believed to be fully supported, but Debug Watchpoints aren’t. (Since Korvo doesn’t support JTAG, that’s no skin off MY nose, but there are ESP32-S31s in other boards. So let’s rejoin the classic Hello World tutorial, already in progress since I ‘accidentally’ knew the first several steps…
$ hello_world cp -r $IDF_PATH/examples/get-started/hello_world .
$ hello_world cp -r $IDF_PATH/examples/get-started/hello_world .
$ hello_world cd hello_world
$ hello_world idf.py set-target esp32s31
$ hello_world idf.py menuconfig
and we get a pretty familiar kconfig screen:
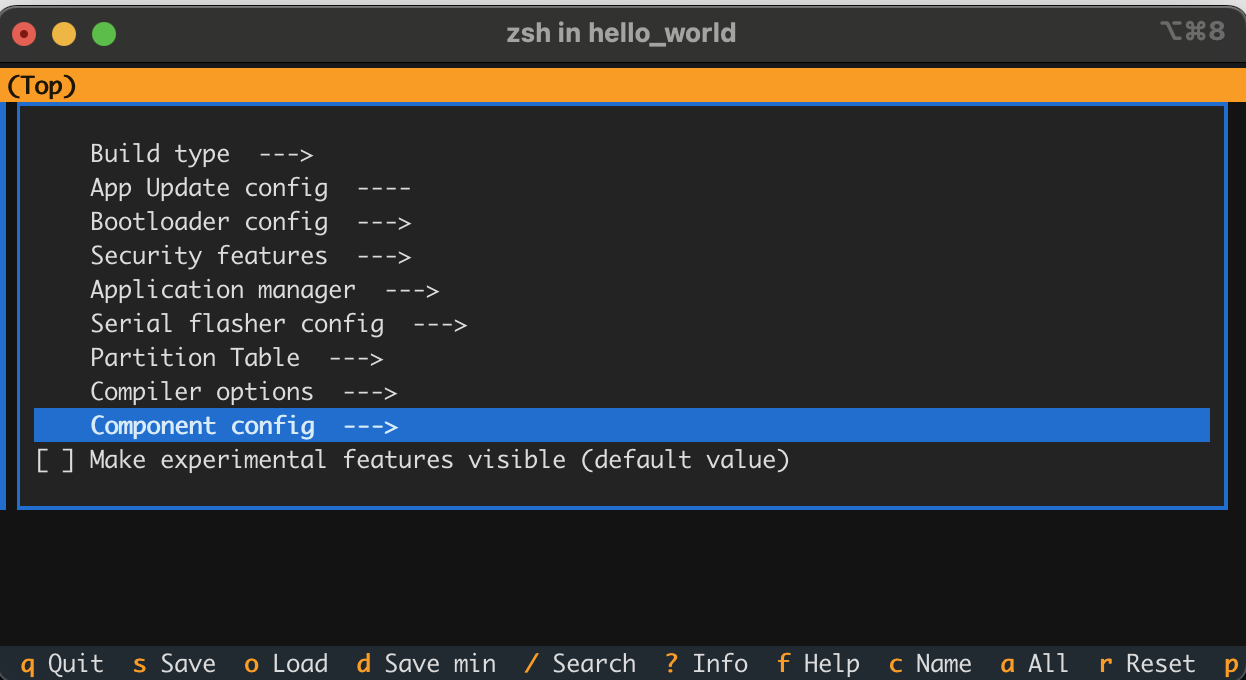
Now since hello_world doesn’t exactly need any WiFi credentials, SPI configuration, stack tweaking, etc. we don’t need to DO anything here; I’m just showing (like Espressif does) to imprint upon readers so they know it’s there when they need it. On to the bitslinging!
$ hello_world idf.py build
[525/530] Linking C static library esp-idf/main/libmain.a
[530/530] cd ~/sr...31/hello/hello_world/build/hello_world.bin
hello_world.bin binary size 0x1ee70 bytes. Smallest app partition is 0x100000 bytes. 0xe1190 bytes (88%) free.
[ ... ] Project build complete. To flash, run:
idf.py flash
or
idf.py -p PORT flash
or
python -m esptool --chip esp32 -b 460800 --before default-reset --after hard-reset write-flash --flash-mode dio --flash-size 2MB --flash-freq 40m 0x1000 build/bootloader/bootloader.bin 0x8000 build/partition_table/partition-table.bin 0x10000 build/hello_world.bin
or from the "~/src/s31/hello/hello_world/build" directory
python -m esptool --chip esp32 -b 460800 --before default-reset --after hard-reset write-flash "@flash_args"

$ hello_world  idf.py --preview -p /dev/cu.usb* flash

Connecting...

A fatal error occurred: This chip is ESP32-S31, not ESP32. Wrong chip argument?
WTH?
$ hello_world find . -name \*.obj | head -3 | xargs file
./build/CMakeFiles/hello_world.elf.dir/project_elf_src_esp32.c.obj: ELF 32-bit LSB relocatable,Tensilica Xtensa, version 1 (SYSV), not stripped
./build/bootloader/CMakeFiles/bootloader.elf.dir/project_elf_src_esp32.c.obj: ELF 32-bit LSB relocatable,Tensilica Xtensa, version 1 (SYSV), not stripped
./build/bootloader/esp-idf/bootloader_support/.../bootloader_support_esp_err_codes.c.obj: ELF 32-bit LSB relocatable,Tensilica Xtensa,version 1 (SYSV), with debug_info, not stripped
That certainly violates principle of least surprise. Let’s redo things we’ve already done.
$ hello_world idf.py --preview set-target esp32-s31
Oho. If you don’t use –preview in the set-target, it will announce that it sets the target (and bugs you to include –preview) but it doesn’t actually set the target. Let’s rebuild. Now when we run file on those same objects, we see:
./build/CMakeFiles/hello_world.elf.dir/project_elf_src_esp32s31.c.obj: ELF 32-bit LSB relocatable, UCB RISC-V, RVC, single-float ABI, version 1 (SYSV), not stripped
Let’s upload:
idf.py --preview -p /dev/cu.usb* flash
and we see the comfort that it’s now including ESP32-S31 action:
python -m esptool --chip esp32s31 -b 460800 --before default-reset --after hard-reset --no-stub write-flash --flash-mode dio --flash-size 2MB --flash-freq 80m 0x2000 build/bootloader/bootloader.bin 0x8000 build/partition_table/partition-table.bin 0x10000 build/hello_world.bin
So let’s peek at the serial line. Here’s one complete output cycle:
ESP-ROM:esp32s31-20251218
Build:Dec 18 2025
rst:0xc (SW_CPU_RESET),boot:0x78 (SPI_FAST_FLASH_BOOT)
Core0 Saved PC:0x2f004192
--- 0x2f004192: cpu_utility_ll_reset_cpu at ~/.espressif/master/esp-idf/components/hal/esp32s31/include/hal/cpu_utility_ll.h:24
--- (inlined by) esp_cpu_reset at ~/.espressif/master/esp-idf/components/esp_hw_support/cpu.c:49
Core1 Saved PC:0x2f0042da
--- 0x2f0042da: esp_cpu_wait_for_intr at ~/.espressif/master/esp-idf/components/esp_hw_support/cpu.c:57
SPI mode:DIO, clock div:1
load:0x2f0740c0,len:0x16a0
load:0x2f06a2b0,len:0xc34
--- 0x2f06a2b0: esp_bootloader_get_description at ~/.espressif/master/esp-idf/components/esp_bootloader_format/esp_bootloader_desc.c:40
load:0x2f06cfb0,len:0x337c
--- 0x2f06cfb0: is_xmc_chip_strict at ~/.espressif/master/esp-idf/components/bootloader_support/bootloader_flash/src/bootloader_flash.c:915
entry 0x2f06a2ba
--- 0x2f06a2ba: call_start_cpu0 at ~/.espressif/master/esp-idf/components/bootloader/subproject/main/bootloader_start.c:27
I (32) boot: ESP-IDF a602e67b 2nd stage bootloader
I (32) boot: compile time Jun 19 2026 02:48:21
I (32) boot: Multicore bootloader
I (34) boot: chip revision: v0.0
I (35) boot: efuse block revision: v0.0
I (39) boot.esp32s31: SPI Speed : 80MHz
I (43) boot.esp32s31: SPI Mode : DIO
I (46) boot.esp32s31: SPI Flash Size : 2MB
I (50) boot: Enabling RNG early entropy source...
I (55) boot: Partition Table:
I (57) boot: ## Label Usage Type ST Offset Length
I (64) boot: 0 nvs WiFi data 01 02 00009000 00006000
I (70) boot: 1 phy_init RF data 01 01 0000f000 00001000
I (77) boot: 2 factory factory app 00 00 00010000 00100000
I (84) boot: End of partition table
I (87) esp_image: segment 0: paddr=00010020 vaddr=40018020 size=075cch ( 30156) map
I (99) esp_image: segment 1: paddr=000175f4 vaddr=2f000000 size=00a24h ( 2596) load
I (102) esp_image: segment 2: paddr=00018020 vaddr=40000020 size=11b68h ( 72552) map
I (119) esp_image: segment 3: paddr=00029b90 vaddr=2f000a24 size=0a0fch ( 41212) load
I (127) esp_image: segment 4: paddr=00033c94 vaddr=2f00ab80 size=024d0h ( 9424) load
I (132) boot: Loaded app from partition at offset 0x10000
I (133) boot: Disabling RNG early entropy source...
I (145) cpu_start: Multicore app
I (154) cpu_start: GPIO 59 and 58 are used as console UART I/O pins
I (154) cpu_start: Pro cpu start user code
I (155) cpu_start: cpu freq: 320000000 Hz
I (156) app_init: Application information:
I (160) app_init: Project name: hello_world
I (164) app_init: App version: 1
I (168) app_init: Compile time: Jun 19 2026 02:48:21
I (173) app_init: ELF file SHA256: 9a6c37f27...
I (177) app_init: ESP-IDF: a602e67b
I (181) efuse_init: Min chip rev: v0.0
I (185) efuse_init: Max chip rev: v0.99
I (189) efuse_init: Chip rev: v0.0
I (193) heap_init: Initializing. RAM available for dynamic allocation:
I (199) heap_init: At 2F00E900 len 0006C6B0 (433 KiB): RAM
I (204) heap_init: At 2F07AFB0 len 000041C0 (16 KiB): RAM
I (210) heap_init: At 2E000000 len 00007FE8 (31 KiB): RTCRAM
I (215) spi_flash: detected chip: generic
I (218) spi_flash: flash io: dio
W (221) spi_flash: Detected size(16384k) larger than the size in the binary image header(2048k). Using the size in the binary image header.
I (234) sleep_gpio: Configure to isolate all GPIO pins in sleep state
I (240) sleep_gpio: Enable automatic switching of GPIO sleep configuration
I (247) main_task: Started on CPU0
I (247) main_task: Calling app_main()
Hello world!
This is esp32s31 chip with 2 CPU core(s), WiFi/BLE, 802.15.4 (Zigbee/Thread), silicon revision v0.0, 2MB external flash
Minimum free heap size: 478304 bytes
Restarting in 10 seconds...
Restarting in 9 seconds...
Restarting in 8 seconds...
Restarting in 7 seconds...
Restarting in 6 seconds...
Restarting in 5 seconds...
Restarting in 4 seconds...
Restarting in 3 seconds...
Restarting in 2 seconds...
Restarting in 1 seconds...
Restarting in 0 seconds...
Restarting now.
Perfect! We have taught our 300 MHz beast to count backward to ten…after printing hello world.
Next?
Hazards of Engineering Samples
This is a 300 MHz part. 🙁
60 GPIOs. Zero free
So I’m working on a project and successfully brought up the software on ESP32-S3 N8R16 (CYD), ESP32-P4 (Tab5), and Korvo. All I needed was to attach one teensy little little sensor.
and just like that, Korvo is out of the running…
Well, not just like that, I had engineering diligence to do. ESP32-S31 has 60 GPIOs; this should be easy. Let’s consult the official ESP32-S31 Korvo pinout.
Do you see all those unassigned pins? Yeah. Gulp. Twelve for the camera. Twenty-three (!) for the screen. (/me waves hand broadly) Five for audio. Six for SDIO. I won’t read the whole list. There are no available pins on this board if you want to use all the existing features.
I could, uuuuh.
- Rob one from the sound, as my application doesn’t REALLY need sound. Stealing PA_CTRL would be kind of obvious.
- Remove the camera connector and solder my pin to that connector or find a camera somewhere and cut up a ribbon connector.
- Solder to the WS2812 at the bottom of the board. WS2812s are write-only, and my device was read-only.
- Steal the boot button. It’s only read at boot. My code wouldn’t release the reset on the device that would start wiggling that pin until after boot, so that’s not totally crazy. Oh, they’re already overloading GPIO61 for the LCD’s SPI Clock.
- I could use one of the buttons (Volume +/-, Set, Mode), right? Haha, Espressif already did this math. All four of those pins go to GPIO_42 with a unique resistor value in a resistor pulldown ladder into an ADC. Depending on if the value read is the difference of (I could do this math. I’m not going to) 10K and (13k, 6.8k, 3.3k, 1.3k) software can figure out which button is pressed. Software probably COULD figure out chords of multiple buttons, but I’m guessing most won’t.
There is *a glimmer of hope* I did actually find two pins—that I groused about earlier in this post—that are somewhat available and that are connected not only to pads that. a human could solder to, but that is brought out to a commodity connector. I could steal one of the USB pins that are USB_DP and USB_DM and rely on the internal GPIO pin mux to connect that to the peripheral I needed. Putting my sensor on a USB-A connector would give me power, ground, input, and the output that would be nice, but optional. It also seems pretty crazy…and still the least crazy of these options.
Epilogue: ESP32-S31 itself is a great chip and screams on my project. If you need exactly the peripherals that Korvo offers, it’s a nifty board to get your code up and running with screen, camera, and A/V-centric peripherals. If you need to add your own peripherals, you should probably instead be working with the Espressif ESP32-S31 Coreboard.
This doc will continue to grow…
This is just my notes from plugging it in and backing up the (awesome) factory demo. Next up: Hello World! (done)